DKIM, SPF and DMARC
What to set up and why
- DKIM — confirms that an email was actually sent from your domain and protects against forgery. It improves the chance of landing in the "Inbox".
- SPF — specifies which servers are authorized to send emails on behalf of your domain. Without it, emails can end up in "Spam".
- DMARC — checks if DKIM and SPF align. If not, it protects your domain from scammers and blocks suspicious emails.
- Google / Mail.net verification — is needed for access to Postmaster tools, where you can monitor domain reputation, complaints, and deliverability.
DNS
DNS (Domain Name System) is a system that translates domain names into IP addresses that computers can work with. In other words, it is a kind of distributed database where the domain name (retailrocket.net) is a human-readable value, i.e., the domain name itself, and the IP address (1.2.3.4) is a technical one, understandable to network devices.
When you enter a website address in your browser, the following happens:
- Your computer sends a request to a DNS server.
- The server searches its database for a match between the domain name and the IP address.
- If it doesn't find one, it forwards the request up the hierarchy until it finds the correct answer.
- Once the IP is found, you can connect to the required server.
This same mechanism is used not only for websites but also for email systems.
The role of DNS in email delivery
What is DNS and why is it needed for email?
When a mail server receives a new email, it performs a series of technical checks to ensure that the email is not fake and does not pose a threat. Many of these checks are based on DNS records:
- SPF (Sender Policy Framework) — indicates from which IP addresses it is allowed to send emails on behalf of the domain.
- DKIM (DomainKeys Identified Mail) — allows you to check if the email has been modified after sending.
- DMARC (Domain-based Message Authentication, Reporting and Conformance) — sets a policy on what to do if SPF or DKIM checks fail.
These DNS records are placed in your domain settings and are read automatically by receiving servers. Their presence and correctness are the key to high email deliverability and domain protection against forgery.
Next, we will look at exactly which records need to be added and how they work in practice.
DKIM
How digital email signing works
DKIM (Domain Keys Identified Mail) is a technology that allows you to verify that an email was actually sent from the declared domain and was not altered in transit. It is based on a cryptographic signature embedded in the email headers.
How it works
When your email leaves the server, the system adds a special DKIM signature to it, created with a private key. This signature is invisible to the recipient and is located in the technical part of the email (in the headers). When receiving the email, the recipient's server queries your domain's DNS record to find the corresponding public key and verifies the authenticity of the signature.
If the signature is correct, the email is considered legitimate. If not, the recipient may treat it with suspicion: send it to spam, mark it as potentially dangerous, or even block it altogether — depending on the security policy settings.
What is needed to enable DKIM
To ensure DKIM support, you need:
- A mail server with DKIM signing functionality.
- Creation of a key pair: private (for signing emails) and public (for verification by recipients).
- Adding a DKIM record when setting up DNS — a text record (
TXT) containing the public key and signature parameters.
Why it is needed
A DKIM signature helps to:
- Confirm that the email was actually sent from an authorized domain.
- Protect recipients from phishing and sender spoofing.
- Increase the trust of mail services in your domain.
- Improve deliverability — emails with a valid signature are less likely to end up in spam.
How public and private keys work in DKIM
DKIM is based on asymmetric encryption, which uses two related keys:
- Private (secret) — stored on the sending mail server and used to create a digital signature.
- Public (open) — placed as a
TXTrecord in the DNS and is available to all servers that want to verify the authenticity of the signature.
How a key pair is formed
- A private key is generated — this is a random unique sequence of characters.
- Based on it, a single associated public key is automatically created using a cryptographic algorithm (usually RSA or Ed25519).
- Since each private key is unique, its public pair is also strictly defined. These two keys work only as a pair.
How it is used in exchange
- Sending: the mail server signs the service headers of the email with the private key — this is the DKIM signature.
- Publication: the public key is published in the domain's DNS as a text record.
- Receiving: the recipient's server requests the public key via DNS and uses it to verify that the email was indeed signed by the sender and has not been altered.
Important: the public key cannot decrypt the signature if it was not created with the paired private key. This is what guarantees the sender's authenticity and the integrity of the email.
Thus, DKIM takes advantage of asymmetric cryptography: verification is performed openly, and security is ensured by storing the private key only on the sender's side.
SPF
Email domain protection and record setup
SPF (Sender Policy Framework) is a sender authentication mechanism that works at the domain level. It complements the standard email sending system and allows you to specify which mail servers are authorized to send emails on behalf of your domain.
Having a correct SPF record when setting up DNS helps to:
- Increase email deliverability;
- Reduce the risk of sender address spoofing;
- Avoid legitimate emails ending up in spam.
How it works
The domain owner adds a special SPF-formatted TXT record to the DNS. It contains a list of IP addresses or domains that are allowed to send emails with addresses like user@yourdomain.com.
Example of an SPF record:
v=spf1 include:_spf.sent2mail.com ~all
This record means:
- Email sending is allowed from the server specified in the SPF record at
_spf.sent2mail.com; - All other attempts should be rejected (
-all).
Important SPF limitations
- SPF works at the domain level but is not inherited by subdomains.
If you send mail from
mail.retailrocket.net, a separate SPF record will be required. - Only one SPF record can be set per domain.
If there are multiple
TXTrecords withv=spf1, there will be an error. All permissions must be combined into one line. - Limitation: a maximum of 10 DNS lookups per SPF record.
Each
include,mx,a, orptrelement can cause additional lookups, bringing you closer to the limit.
DMARC
Control and reporting for email security
DMARC (Domain-based Message Authentication, Reporting & Conformance) is a mechanism that tells mail systems how to handle emails that fail authentication checks. It relies on the results of SPF and DKIM.
DMARC does not replace these technologies but adds a layer of control: if an email fails SPF or DKIM (or both), DMARC specifies what to do with it — deliver it, mark it as spam, or reject it.
What does a DMARC record do?
It is a TXT record in DNS that:
- Specifies the policy for handling forged emails;
- Allows you to receive reports on domain spoofing attempts;
- Increases trust in sends from your domain.
DMARC should only be set up after SPF and DKIM are correctly configured, otherwise, a large portion of your emails will be mistakenly considered forged.
What does DMARC provide?
- Control over how emails with spoofed addresses are handled;
- Reduced risk of phishing using your domain;
- The ability to track who is trying to send mail on behalf of your company and from where;
- Increased domain reputation in the eyes of email providers.
How to independently check domain records after DNS setup
After you have set up SPF, DKIM, and DMARC, it is important to make sure that the records are actually published and accessible from the outside. The check takes only a couple of minutes and can save you from errors that affect deliverability.
Online services
The most popular is MXToolbox:
- Go to https://mxtoolbox.com/SuperTool.aspx
- Enter your domain (e.g.,
retailrocket.net) and select the desired check type, for example:
- SPF Record Lookup
- DKIM Lookup (specify selector:
selector._domainkey.example.com) - DMARC Lookup
You will get a breakdown of the record contents and status (valid / missing / with errors).
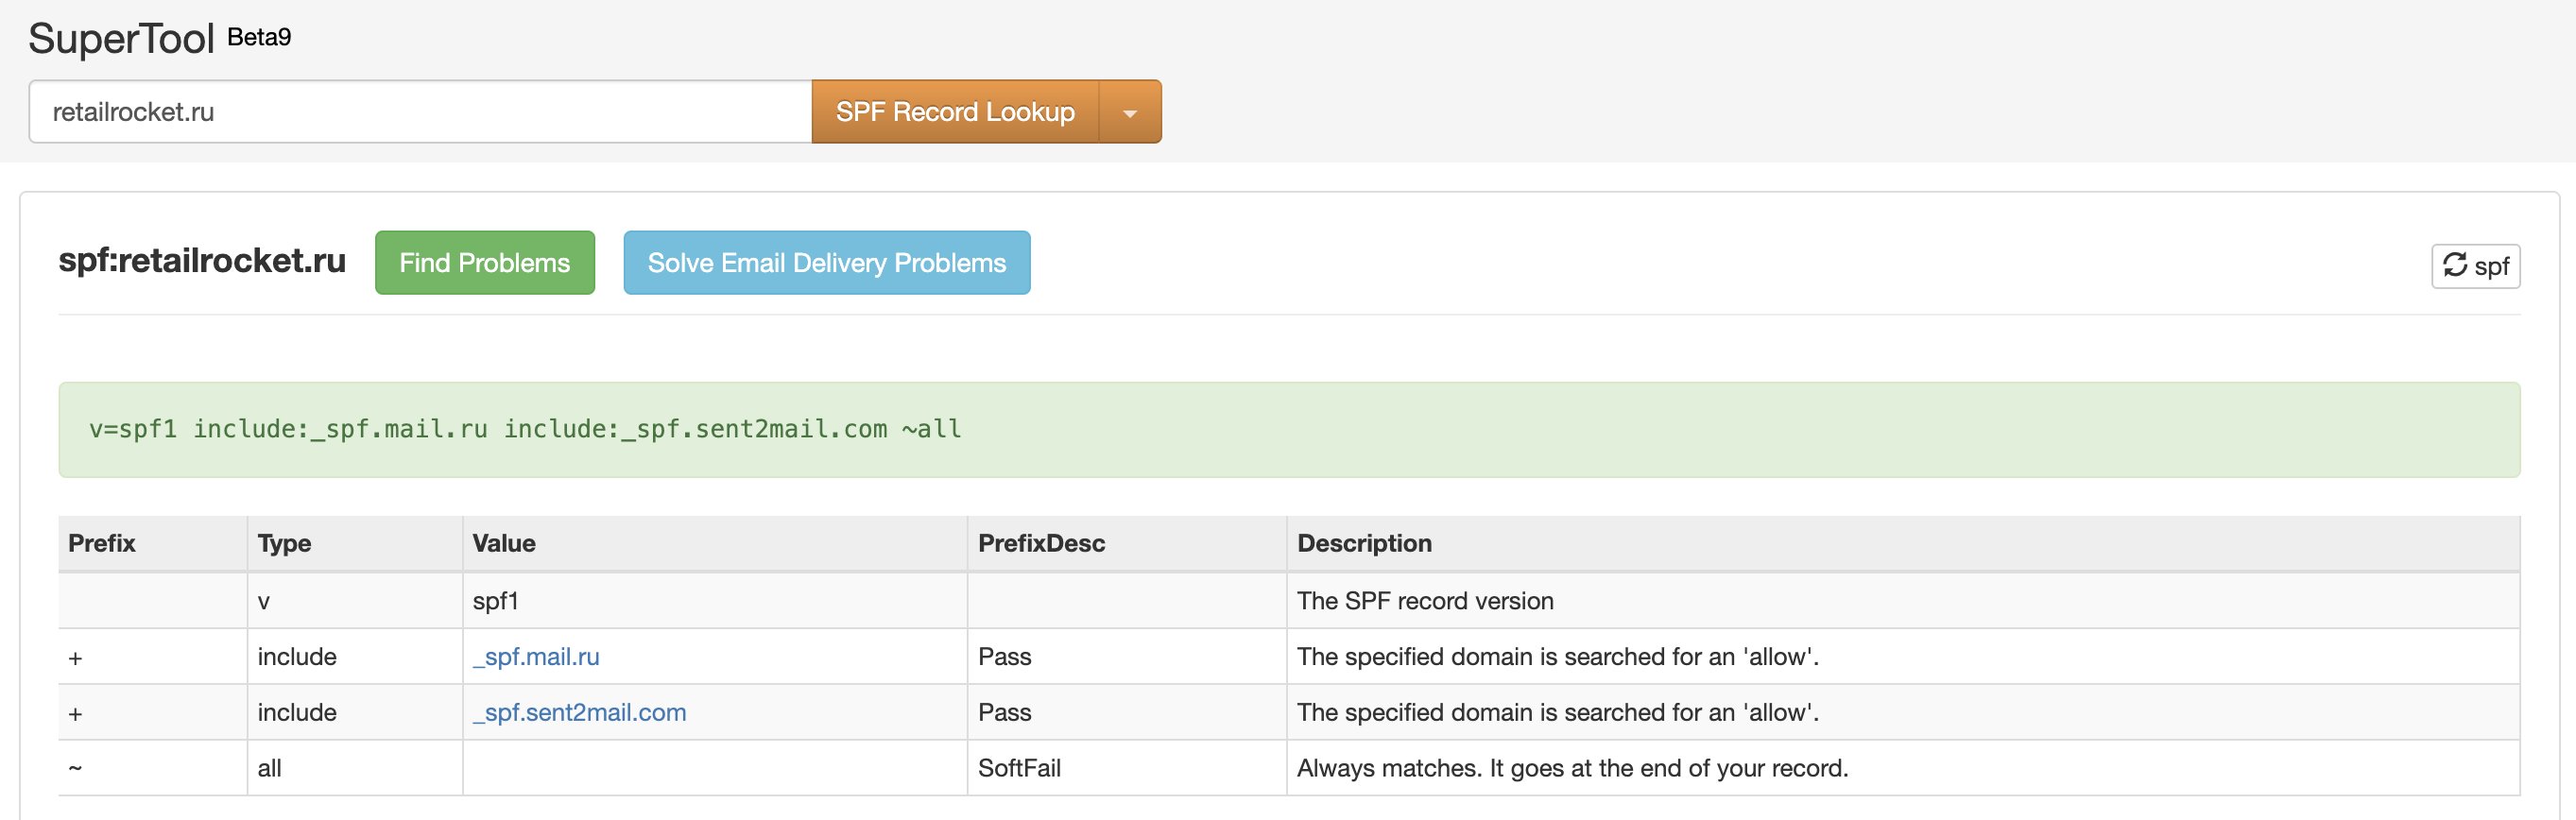
In the screenshot above, we see the SPF record on the requested domain, everything is set up validly.
Recommendation
Check the records 5-15 minutes after saving — some DNS servers update with a delay, up to 72 hours.
Conclusion
Proper DNS record setup is the foundation of a reliable and secure email campaign. Without it:
- your emails can end up in spam;
- attackers can send emails on your behalf;
- major providers (Google, etc.) do not trust the sender;
- major providers (Google, etc.) do not trust the sender;
- it is impossible to track the deliverability and reputation of the domain.
With SPF, DKIM, and DMARC, you show providers that you control sending from your domain and protect your recipients from phishing, which allows you to effectively conduct email campaigns.
How to get specific records
To connect to Retail Rocket's mailing transports, you need to set up DNS in advance. Each platform (e.g., Sent2Mail) uses unique domain signatures and keys. Therefore:
You can get instructions with a list of specific records for your domain (including DKIM, SPF, DMARC values, and verification CNAME/TXT records) from your CSM manager at Retail Rocket.
Retail Rocket technical specialists will help you at all stages of setup — from key generation to checking the correctness of records. No deep technical knowledge is required: just pass the instructions to your administrator or domain provider.