Client-side integration
Connection stages
1. Basic integration
The integration of the Rocket Search search system requires at least a basic Retail Rocket integration, which includes the transfer of the product database and the setup of user behavior tracking.
However, for search, it may be necessary to configure the transfer of additional product attributes that are required for filter settings, as well as the search results themselves.
For example: if your desired search results design should contain a screen diagonal filter for televisions, then this diagonal parameter must be passed in the product database.
You can find more information about starting integration with Retail Rocket in the corresponding section.
2. Preparing a demo stand
After receiving the store's product database, we form a demo stand in a standard design. This stage allows evaluating the quality of the search results, taking into account the specifics of the particular assortment.
Each store has unique characteristics of its product base, as well as its own idea of an "ideal" search result. Early analysis of these factors helps to identify possible nuances and take them into account when setting up the search, which significantly improves the final quality of work.
To speed up the process of achieving optimal results, it is recommended to launch the demo stand as early as possible.
3. Client-side design implementation
Before starting work, all requirements for the appearance and behavior of the interface are agreed upon and fixed. This ensures transparency of the process and eliminates misunderstandings at the implementation stage.
The development of the design and UI is carried out on a separate demo stand, where you can see the progress of work and evaluate the result in real time. This approach allows you to understand in advance how the product will look and function on the store's website before integration.
4. Integration into the store's website
At this stage, the product is connected to your website. A detailed description of the integration process can be found in the following sections of this instruction.
Using prepared demo stands makes the integration process more transparent and predictable: you see in advance what the result will be and gain confidence in the correctness of the product's operation after implementation.
Integration Process
Script connection
It is necessary to place a link to the script in the <head> tag:
<script src="https://cdn.rocketsearch.net/content/javascript/smartsearch/{{partnerId}}/latest/index.umd.js"></script>
- partnerId - unique identifier of your online store in Retail Rocket, issued upon registration;
- Instead of manually connecting the script, you can use the npm package manager;
Web component placement
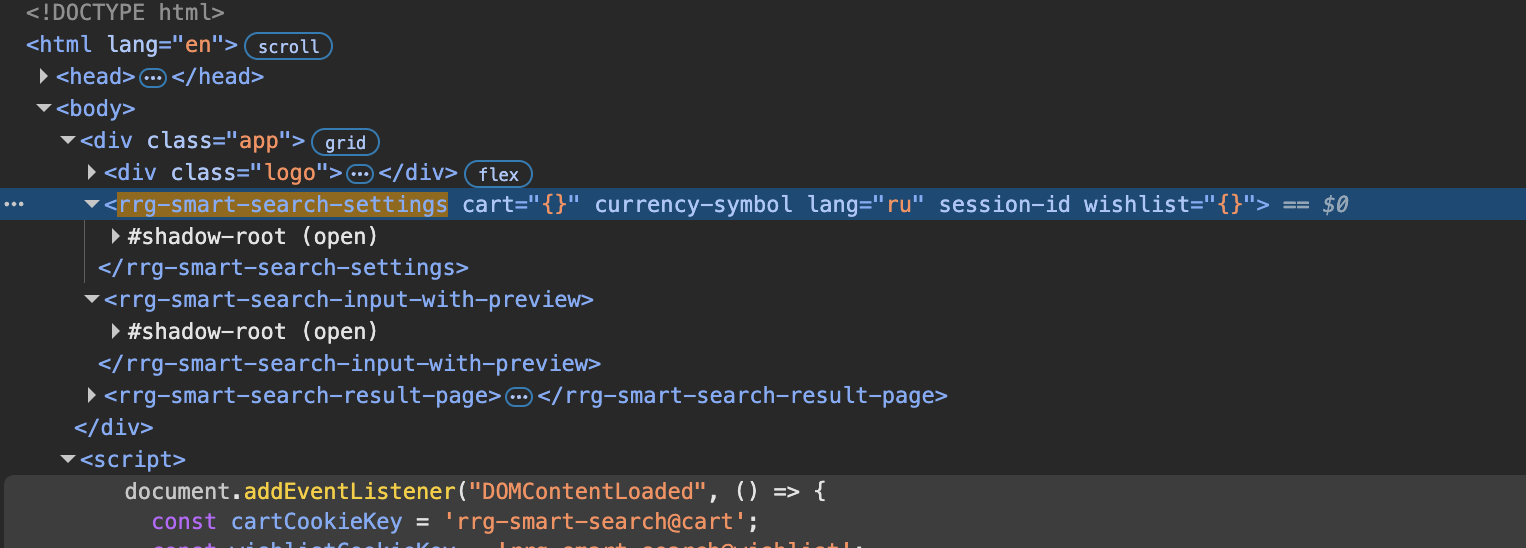
Search settings component
To use the search preview, you need to add the <rrg-smart-search-settings> web component to your store's layout:
<rrg-smart-search-settings
  lang="ru"
  stock="84"
  cart='{"10320617":5,"13082044":3,"80293500":2}'
  wishlist="{10320617:true,13082044:true}"
></rrg-smart-search-settings>
Component parameters:
- lang - store language;
- stock - current user's stock, if multi-regionality is used;
- cart - contents of the store's cart in the format
{product ID: quantity}; - wishlist - contents of the wishlist in the format
{product ID: true | false};
These parameters are not required if the search results do not highlight the presence of products in the cart or wishlist for the current user
Search preview component
To use the search preview, you need to add the <rrg-smart-search-input-with-preview> web component to your store's layout, instead of the search phrase input field.
<rrg-smart-search-input-with-preview></rrg-smart-search-input-with-preview>
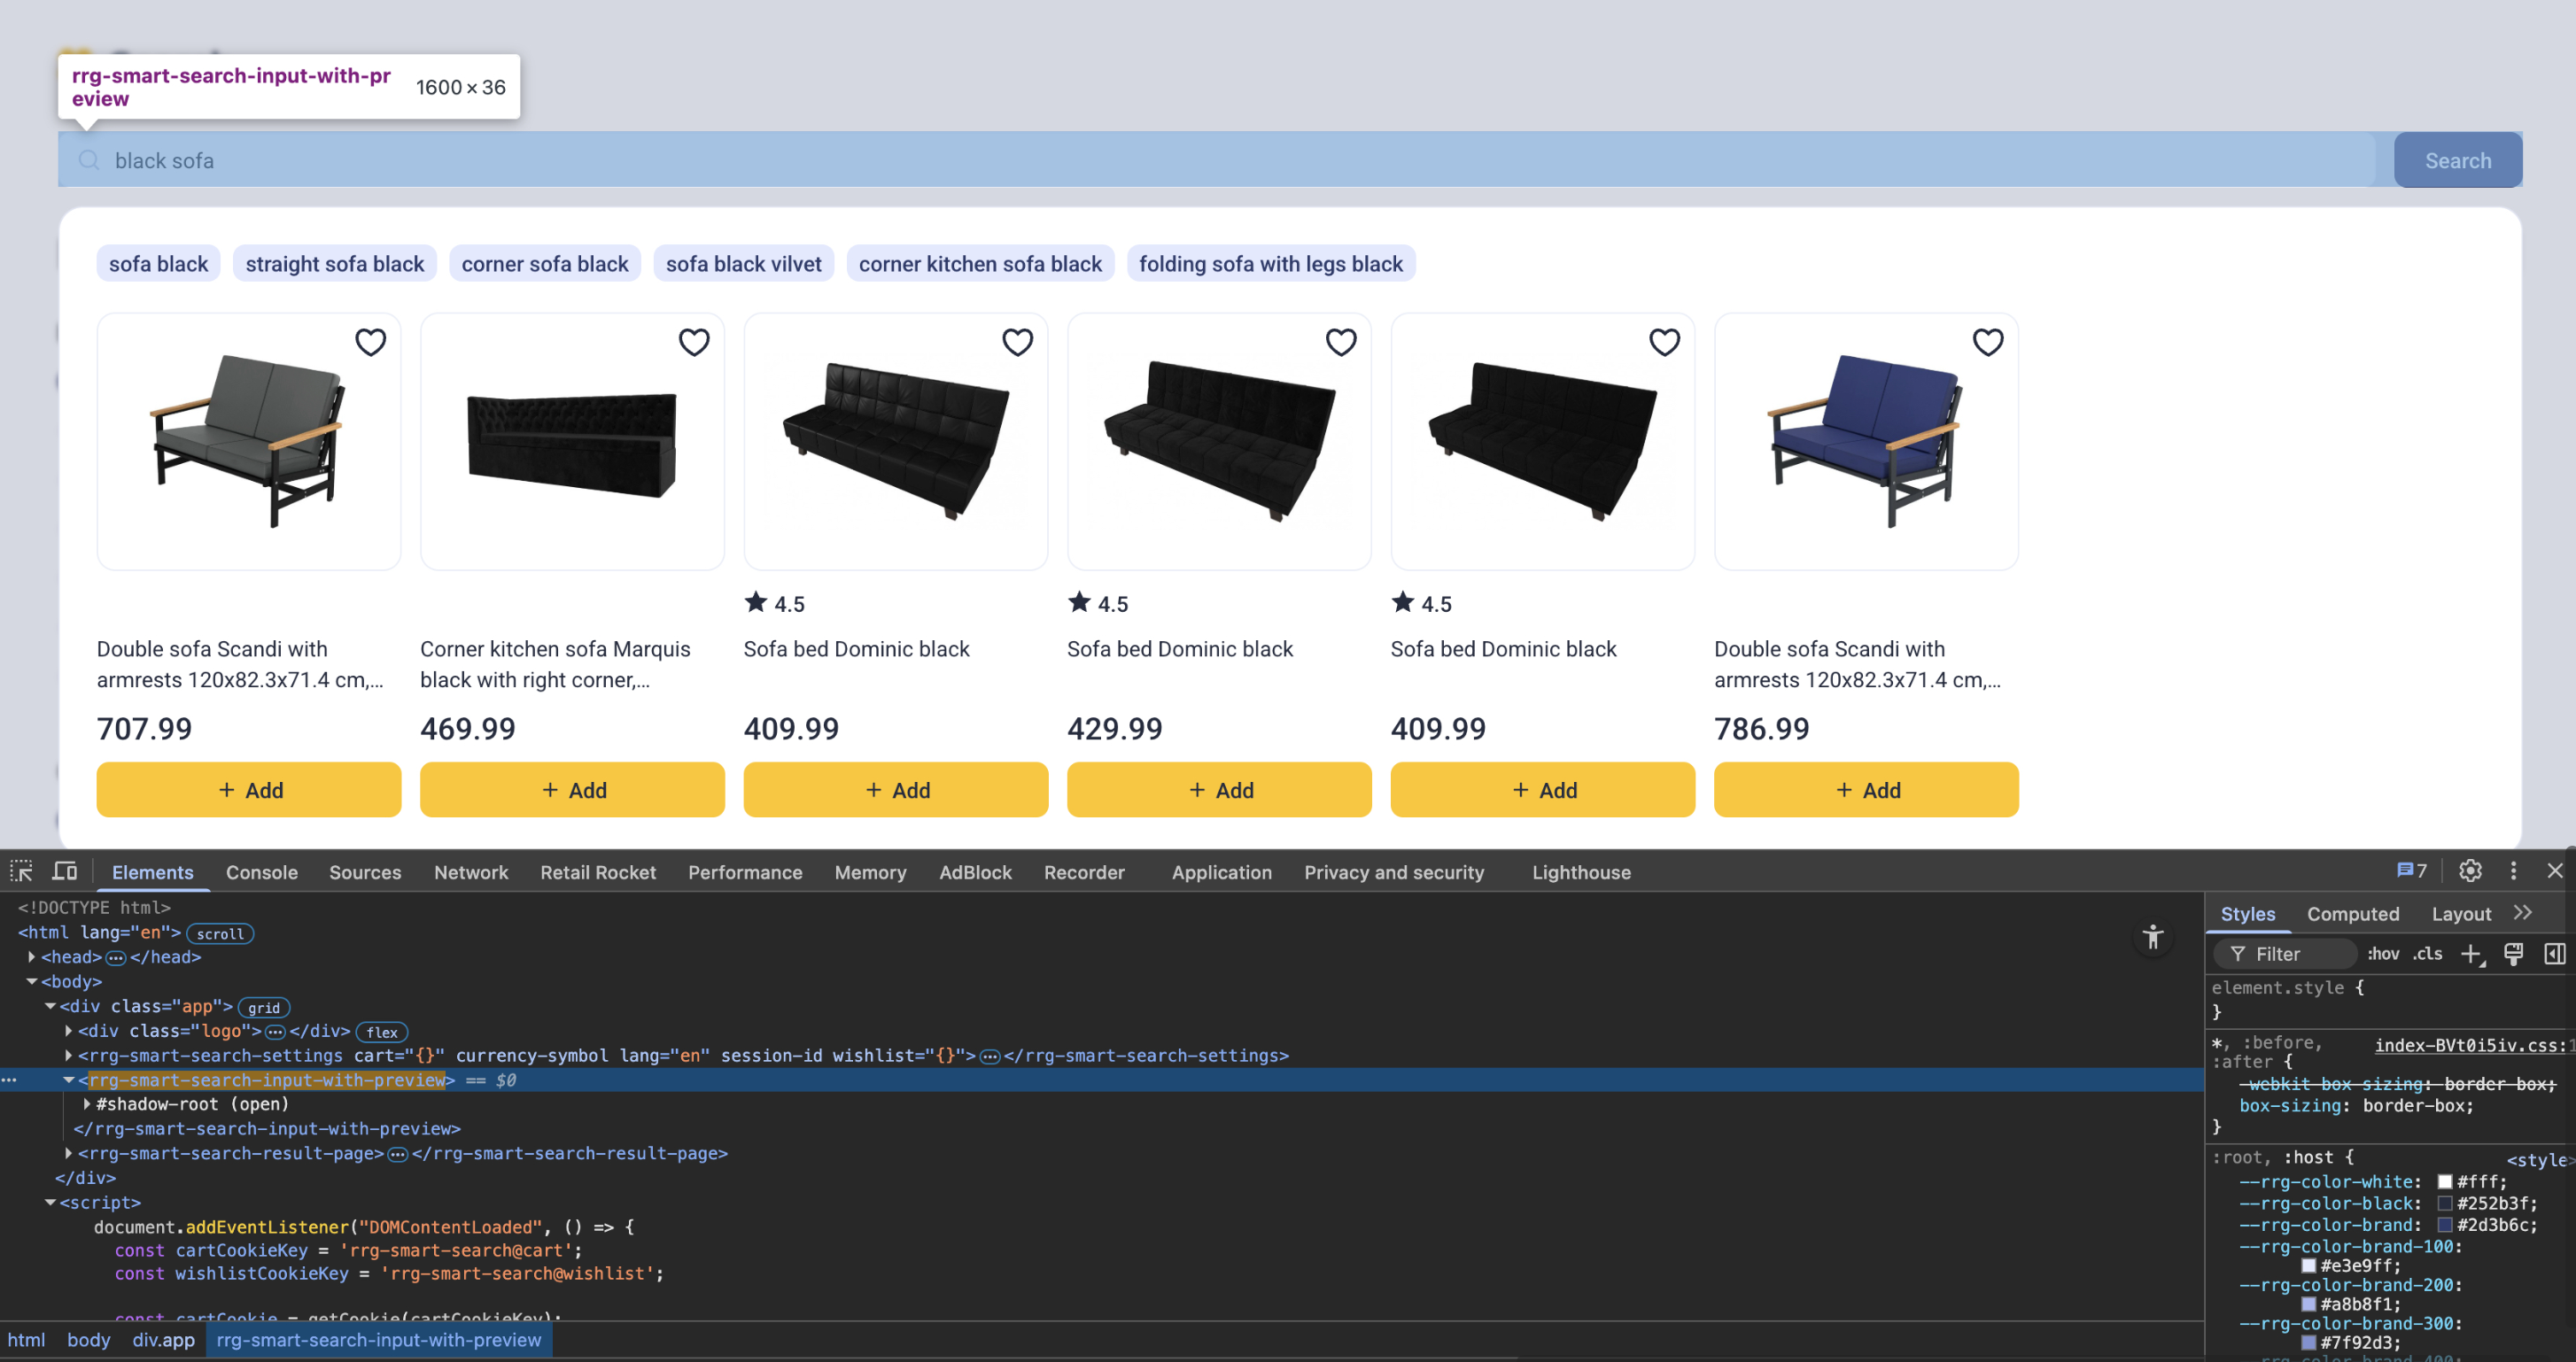
The design and behavior of the web component replicate the replaced part of the store's website. This allows you to maintain a consistent visual style and provide users with a seamless experience on the website.
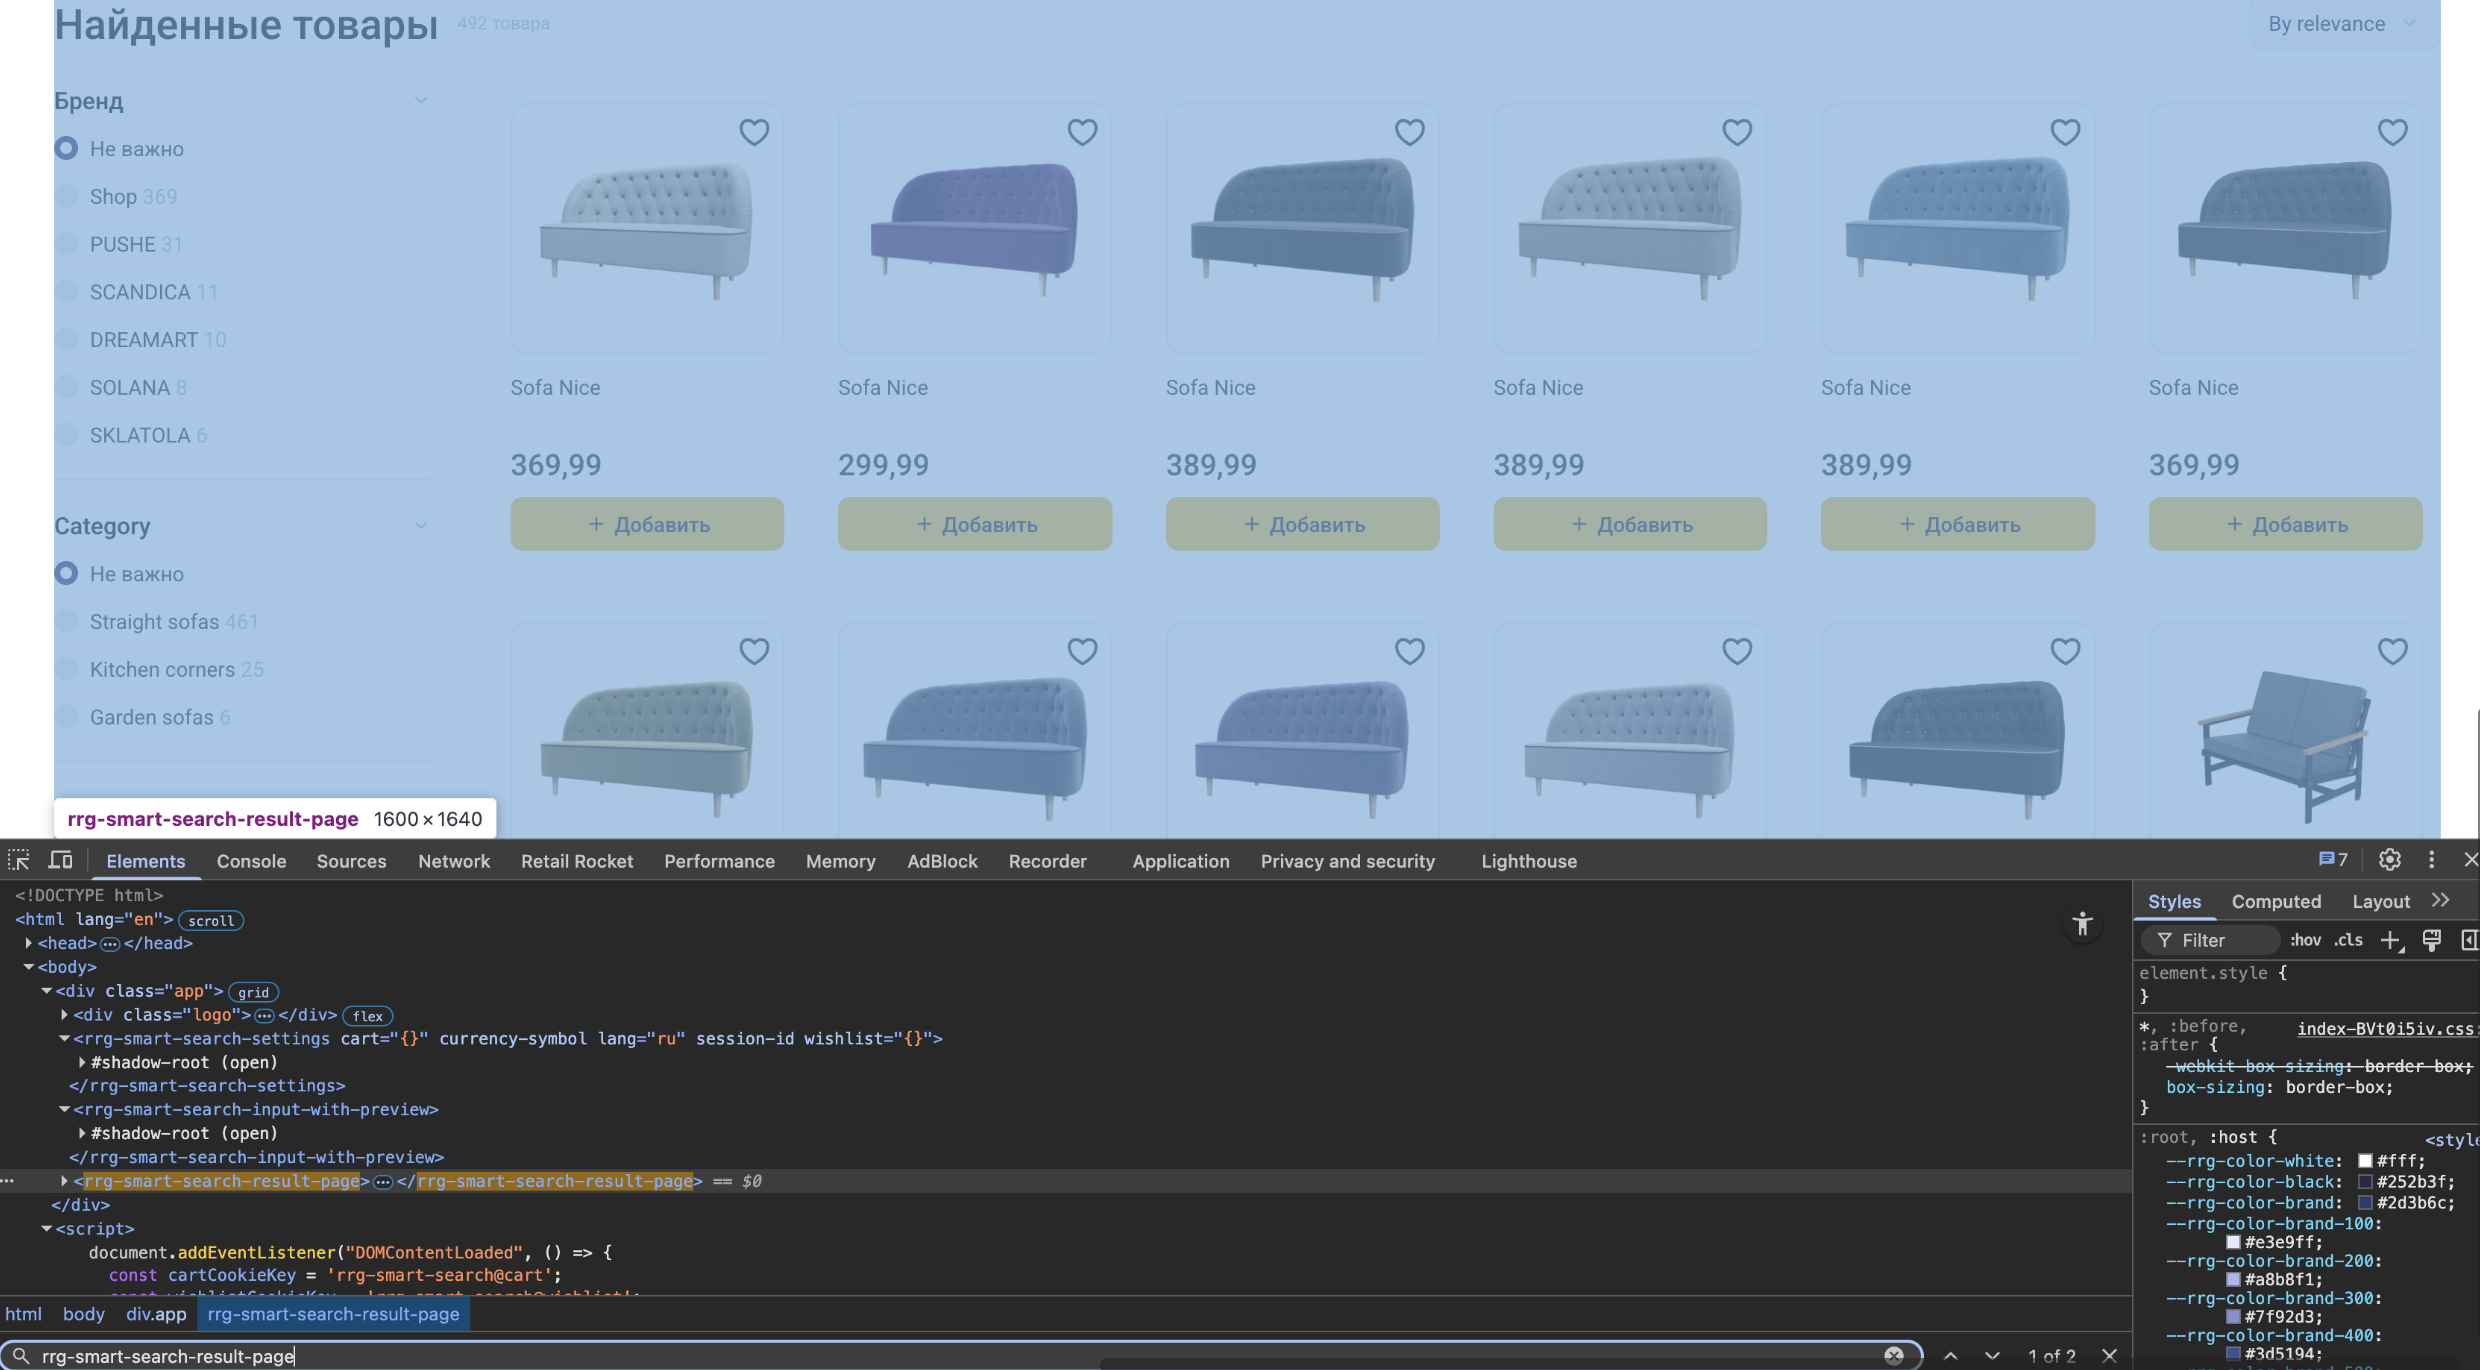
Search results component
To display search results, you need to add the <rrg-smart-search-result-page> web component to the search results page in your store's layout.
<rrg-smart-search-result-page></rrg-smart-search-result-page>
The web component is placed instead of the existing search results on the online store that should be replaced by Rocket Search.
- The user enters a search phrase and sees a search preview;
- Then presses enter or initiates another way to get all results;
- The web component redirects the user's browser to the search results page;
- The web component shows the full search results;
User events
You can receive information about user interactions with the interface - for example, clicking on a product, adding a product to the cart from search, or adding to favorites. For this, the possibility of subscribing to the corresponding web component events is provided.
Thus, you will be able to timely update the cart status, collect statistics on user actions, or use this data for other business tasks.
Event types:
- clickOnProduct - click on a product;
- addToCart - adding a product to the cart;
- removeFromCart - removing a product from the cart;
- addToWishlist - adding a product to the wishlist;
- removeFromWishlist - removing a product from the wishlist;
<script>
  document.addEventListener("DOMContentLoaded", () => {
    const previewComponent = document.querySelector('rrg-smart-search-input-with-preview');
    const resultPageComponent = document.querySelector('rrg-smart-search-result-page');
    const settingsComponent = document.querySelector('rrg-smart-search-settings');

    const onClickOnProduct = ({ detail: productId }) => {
      console.log(`Product clicked: ${productId}`);
    }
    previewComponent.addEventListener('clickOnProduct', onClickOnProduct);
    resultPageComponent.addEventListener('clickOnProduct', onClickOnProduct);

    const onAddToCart = ({ detail: productId }) => {
      ... // средствами магазина добавить товар в корзину текущего пользователя
      const cartProducts = ... // получить содержимое корзины
      // в формате вида {10320617:5,13082044:3,80293500:2}
      settingsComponent.setAttribute("cart", cartProducts);
      rrApi.addToBasket(productId) // отправить событие базового трекинга
      console.log(`Product added to cart: ${productId}`);
    }
    previewComponent.addEventListener("addToCart", onAddToCart);
    resultPageComponent.addEventListener("addToCart", onAddToCart);

    const onRemoveFromCart = ({ detail: productId }) => {
      ... // средствами магазина убрать товар из корзины текущего пользователя
      const cartProducts = ... // получить содержимое корзины
      // в формате вида {10320617:5,13082044:3,80293500:2}
      settingsComponent.setAttribute("cart", cartProducts);
      console.log(`Product removed from cart: ${productId}`);
    }
    previewComponent.addEventListener("removeFromCart", onRemoveFromCart);
    resultPageComponent.addEventListener("removeFromCart", onRemoveFromCart);

    const onAddToWishlist = ({ detail: productId }) => {
      ... // средствами магазина добавить товар в избранное текущего пользователя
      const wishlistProducts = ... // получить содержимое избранного
      // в формате вида {10320617:true,13082044:true}
      settingsComponent.setAttribute("wishlist", JSON.stringify(wishlistProducts));
      console.log(`Product added to wishlist: ${productId}`);
    }
    previewComponent.addEventListener("addToWishlist", onAddToWishlist);
    resultPageComponent.addEventListener("addToWishlist", onAddToWishlist);

    const onRemoveFromWishlist = ({ detail: productId }) => {
      ... // средствами магазина убрать товар из избранного текущего пользователя
      const wishlistProducts = ... // получить содержимое избранного
      // в формате вида {10320617:true,13082044:true}
      settingsComponent.setAttribute("wishlist", wishlistProducts);
      console.log(`Product removed from wishlist: ${productId}`);
    }
    previewComponent.addEventListener("removeFromWishlist", onRemoveFromWishlist);
    resultPageComponent.addEventListener("removeFromWishlist", onRemoveFromWishlist);
  });
</script>