Integration start
General overview of the integration process
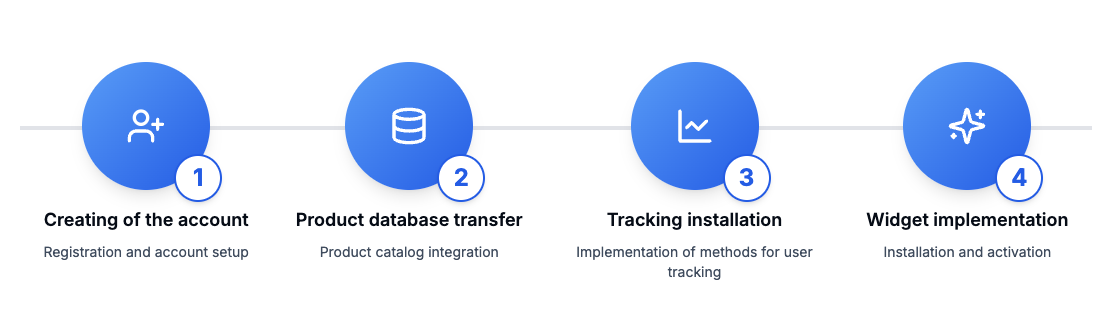
Retail Rocket integration includes several stages:
- Registration - creating an account and obtaining a unique ID
- Setting up product database transfer — transferring the product catalog
- Installing tracking — tracking of user behaviour
- Placing widgets — integrating widgets into the user interface
Step-by-Step integration process
For successful Retail Rocket integration, you will need:
- Access to the code of your website, application, or backend of any other platform for the Retail Rocket product
- Possibility to set up regular data export (product catalog) using one of several available methods
Stage 1: Account setup and partner access
- Register account on the Retail Rocket website
- Get access to the Retail Rocket personal account and partner ID
- Choose the required integration type
Stage 2: Setting up product data transfer
Depending on the type of product database transfer you have chosen, configure its export to Retail Rocket.
Transferring the product database via XML File
The product feed must be constantly updated when product information changes
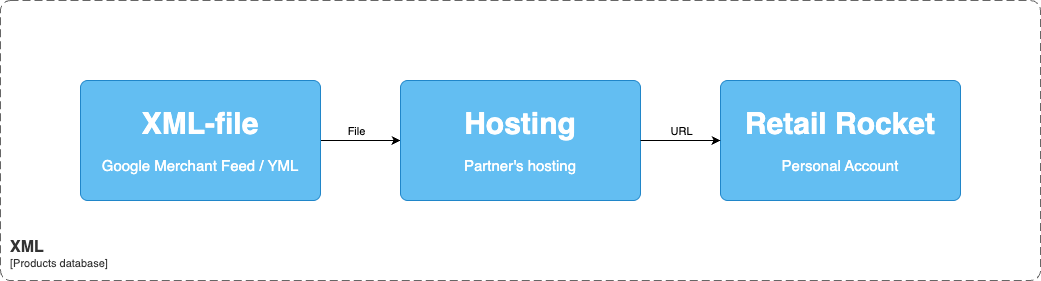
You need to prepare a product feed in your chosen format that corresponds to the platform requirements and upload it to your hosting.
Then the link to the file needs to be uploaded to the Retail Rocket dashboard you created earlier. Our service will regularly request and download the feed from the specified URL. More details about synchronization can be found here.
Transferring the product database via Product API (client-to-server)
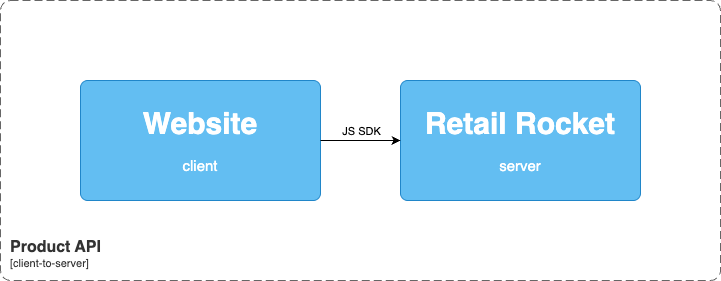
On the product card, in addition to JS SDK methods for tracking user behaviour, you need to install an additional method that will transfer information to Retail Rocket when the page loads.
Documentation for the method can be found in the corresponding section.
Transferring the product database via Product API (server-to-server)

On your backend server, you need to configure the sending of product data to the corresponding method.
Documentation for the method can be found in the corresponding section.
Stage 3: Installing user behaviour tracking
Depending on the type of integration you have chosen, place the tracking methods on the appropriate pages.
Behaviour tracking with JS SDK Integration (client-to-server)
This method is available only for use on a website
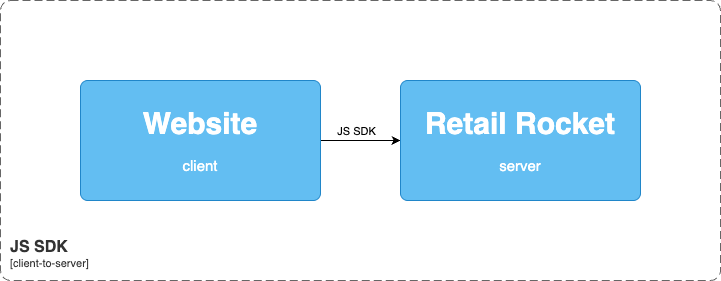
Forclient-to-server type of integration, you need to place the main tracking code in the <head> section of each page of the site, in which you need to specify the ID value of your account, received after the account creation stage.
You also need to configure the call of the corresponding JS SDK methods for specific user actions:
List of tracked actions
To work with these methods within the corresponding page, you need to have the following data:
List of Variables
- Product ID
- Category ID
- Order information (Product ID, quantity, price, transaction ID)
- User information (User ID, email address, additional parameters)
Thus, you will need to edit several templates of your website pages, placing JS functions in them.
Behaviour tracking with API Integration (server-to-server)
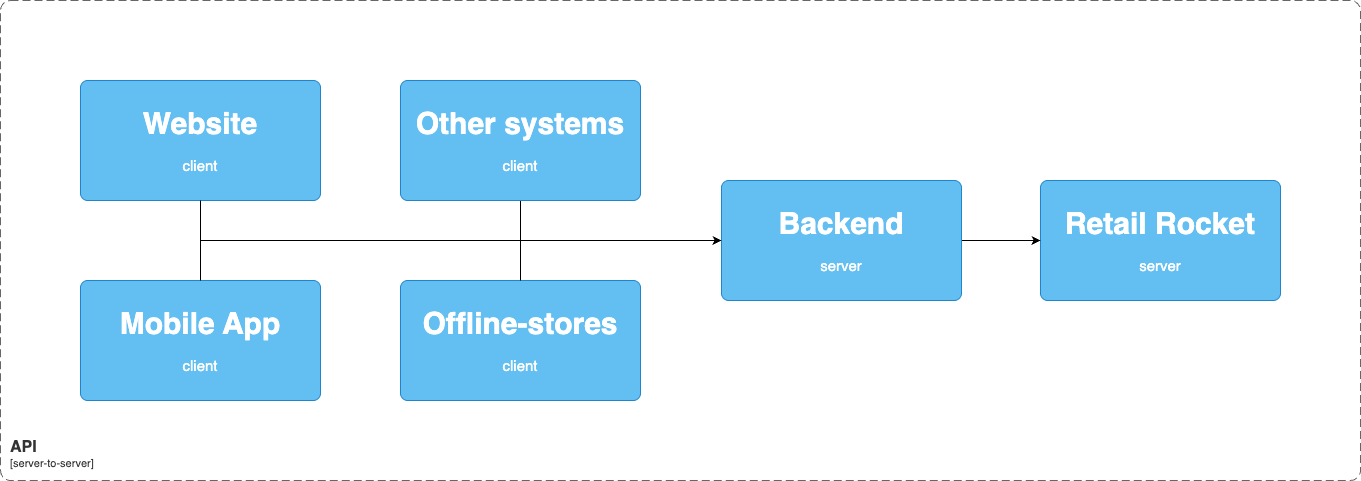
API methods cannot be called on the client side, as they contain an API key, the leakage of which can lead to security problems.
You need to implement API proxying, which will receive events from the client on your backend, and the backend in turn will send events to Retail Rocket.
Next, you need to configure the call of the corresponding API events for certain user actions.
List of tracked actions
To work with these methods within the corresponding page, you need to have the following data.
List of required variables
- Product ID
- Category ID
- Order information (Product ID, quantity, price, transaction ID)
- Search phrase entered by the user
- User information (User ID, email address, additional parameters)
Stage 4: Installing widgets
Widgets with personal recommendations
Request a widget implementation map from your account manager, and place HTML codes on the specified pages and places of the site.
Additionally, on this tariff, the method of installing widgets via API is available; for this, set up recommendation requests and block rendering according to the received implementation map.
Widgets with sponsored content
Request a widget implementation map from your account manager, and place HTML codes on the specified pages and places of the site.
Additionally, the method of installing widgets via API is available; for this, set up requests for sponsored content and their rendering according to the received implementation map.
Updated 27 days ago