Woocommerce module
Module Download
You can download the Woocommerce integration module via this link.
Installation Guide
The following guide contains step-by-step instructions to help you to install and configure the module effectively.
Module installation
Tracking codes
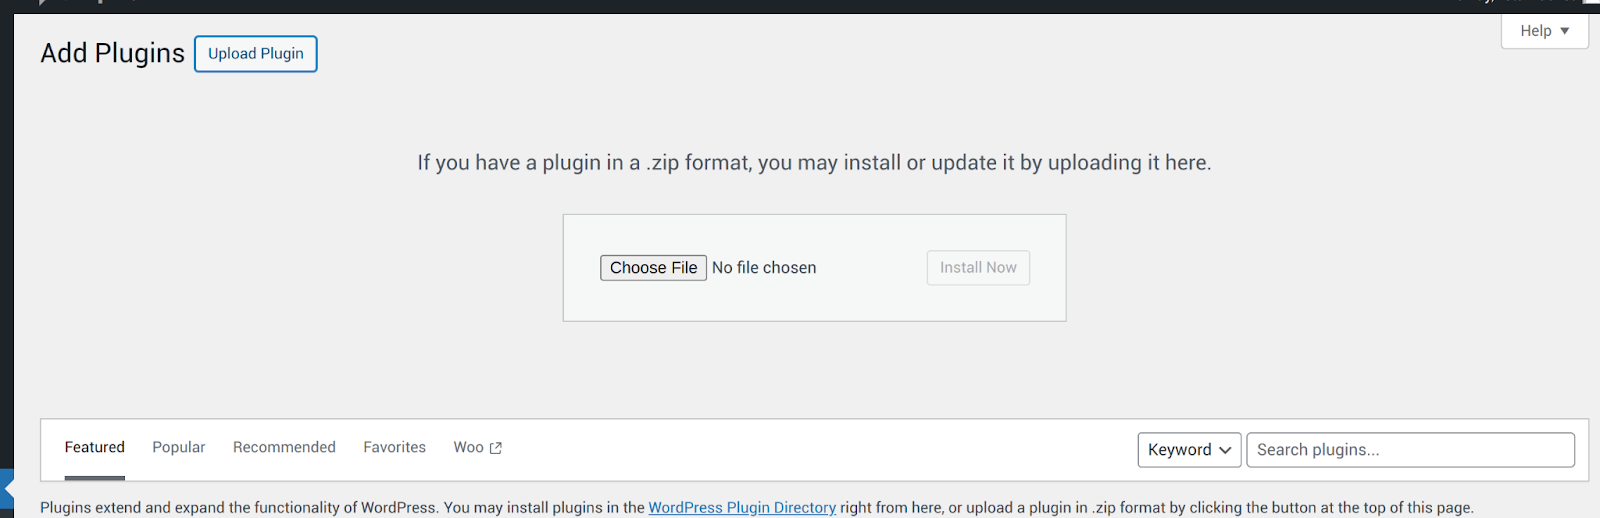
In the menu select "Plugins" > "Add Plugins" > "Upload Plugins".
Click "Choose file" and upload .zip archive with plugin that you downloaded from the link in the beginning of this page.
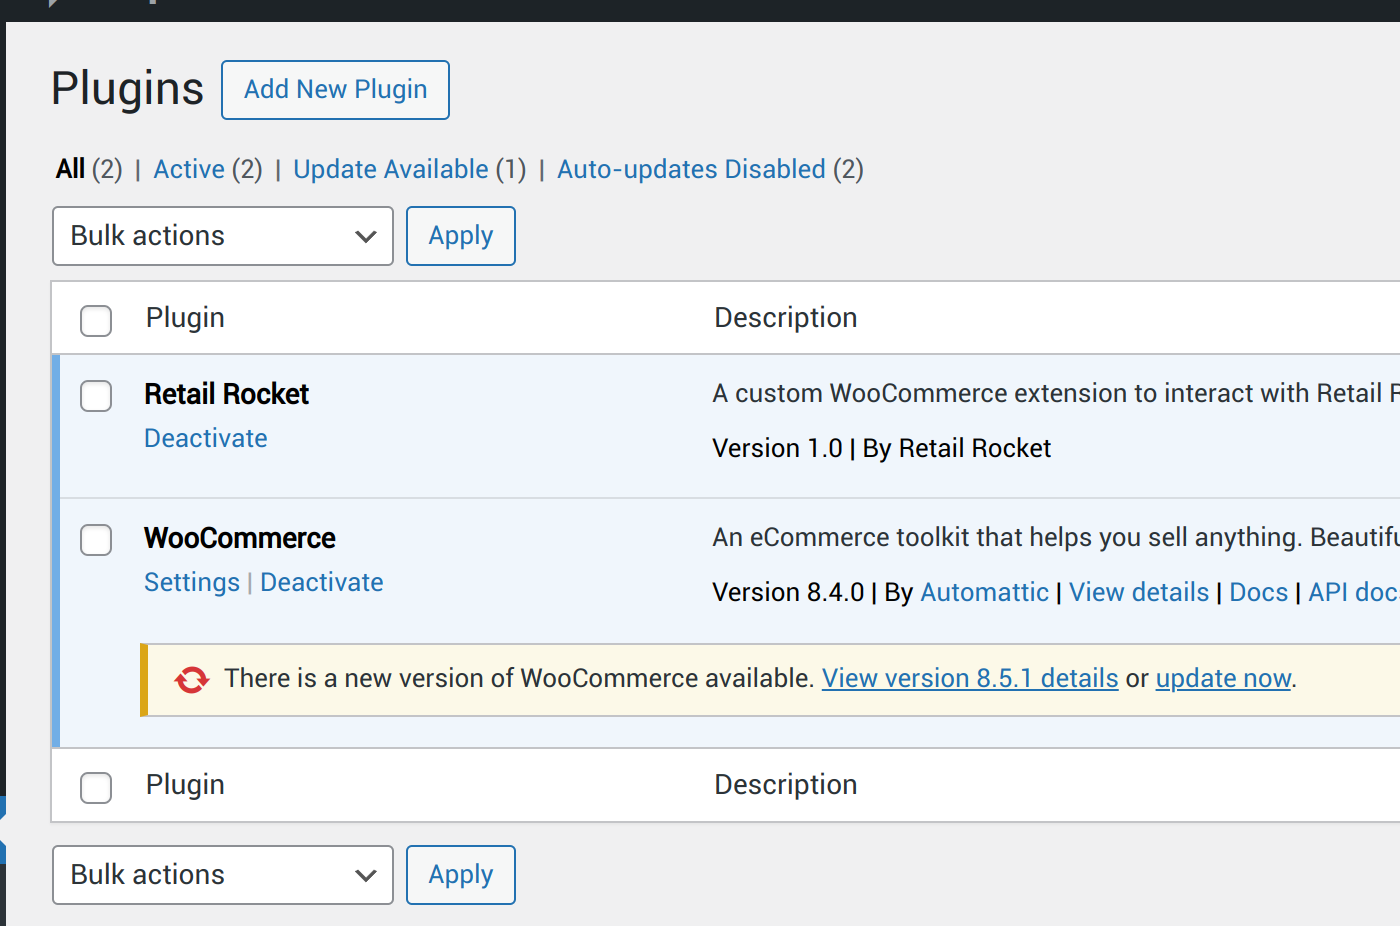
You will see plugin in the list of plugins, it should be activated.
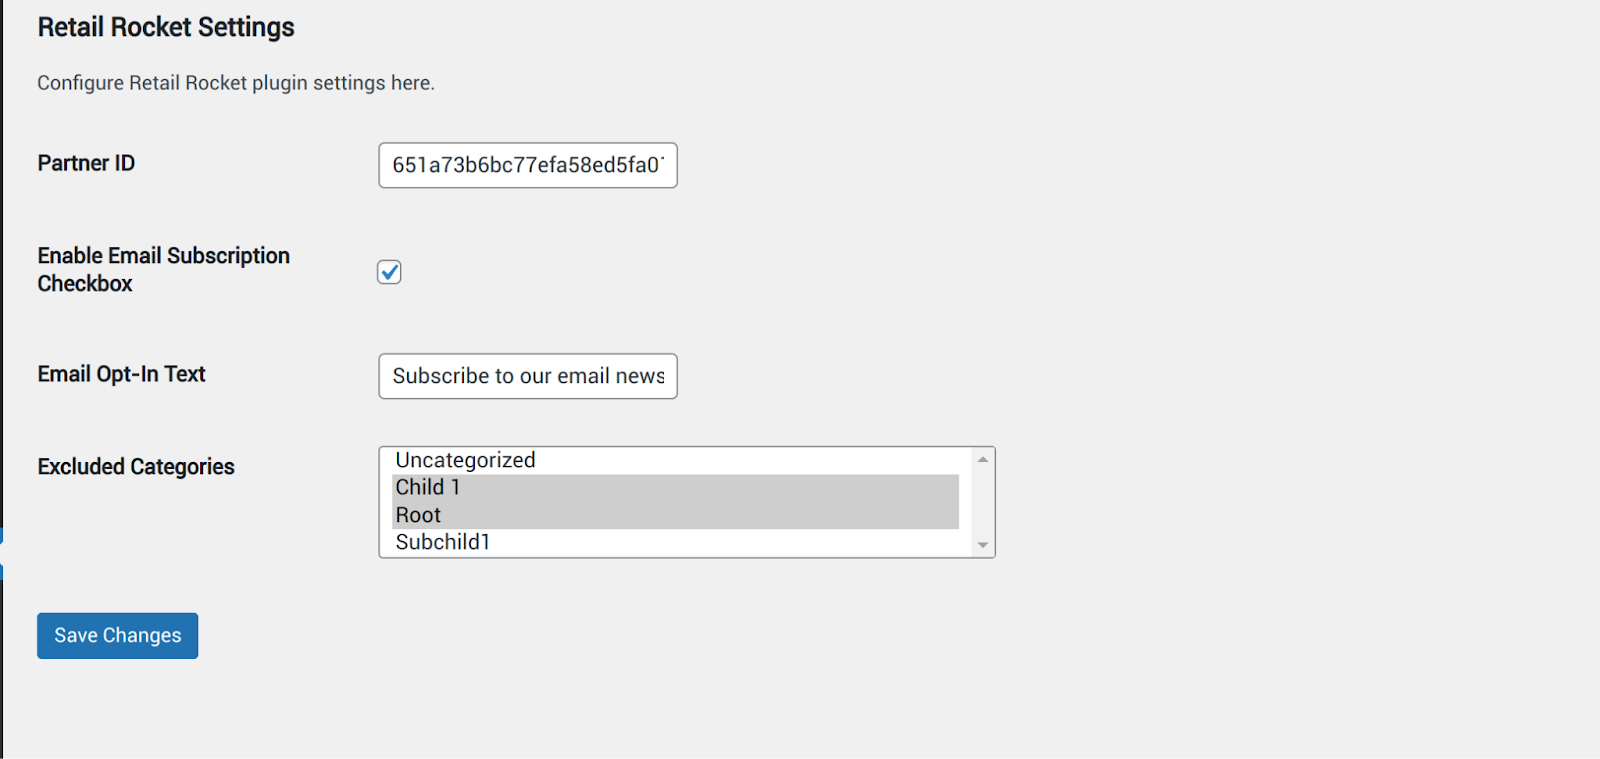
After the plugin is activated, navigate to the settings menu:

Fill in the partner ID, and optional settings - excluded categories, and email opt-in text, if the opt-in checkbox needs to be added by the plugin (see below)
After the changes are saved, the following tracking will be enabled:
- Main trackers
- Product data with group IDs (Product API sync)
- Product views tracker
- Category data
- Category views tracker
- Email tracker
- Add to cart tracker
- Transaction tracker
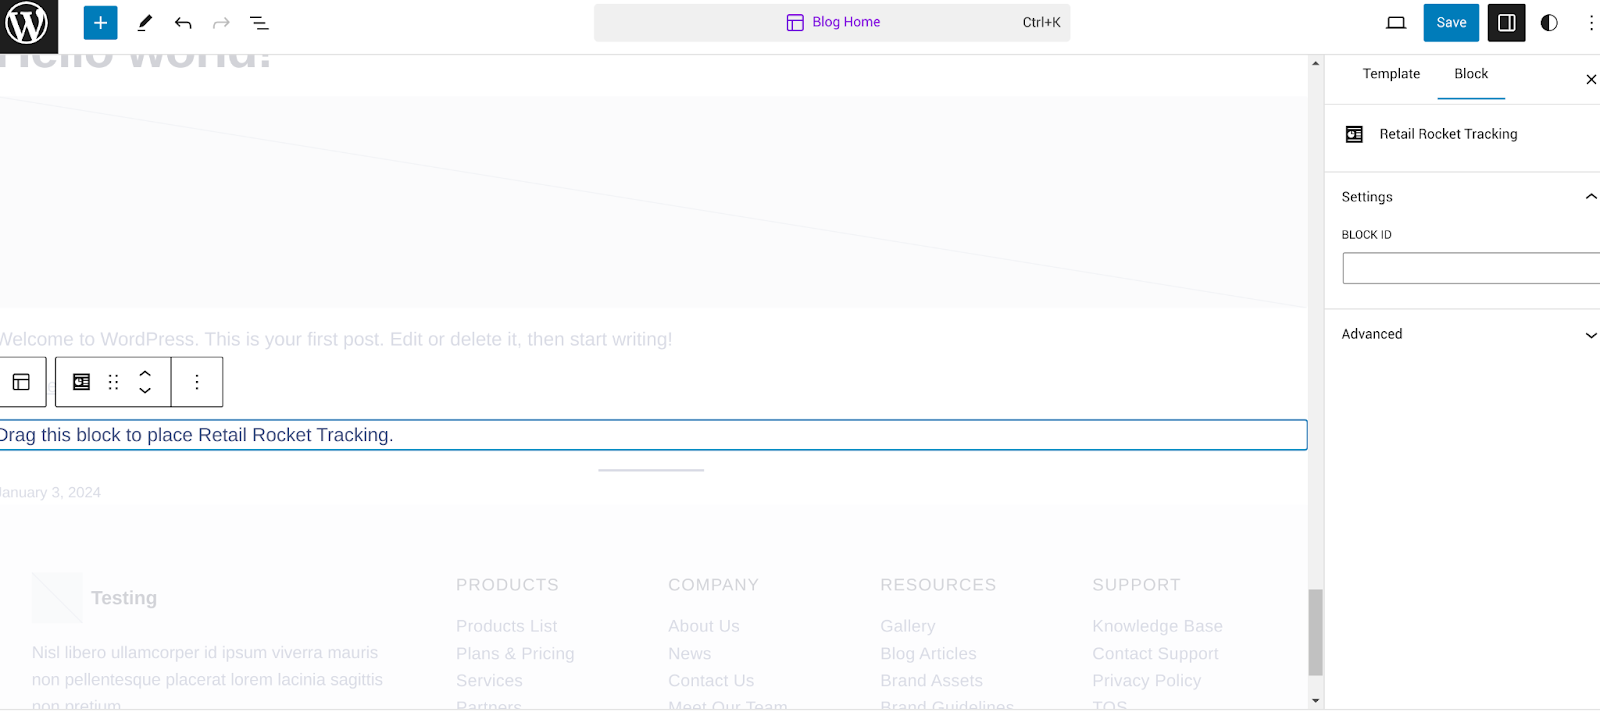
Markup Blocks
To install markup blocks, go to “Editor” and chose “Retail Rocket Tracking” from the list of blocks
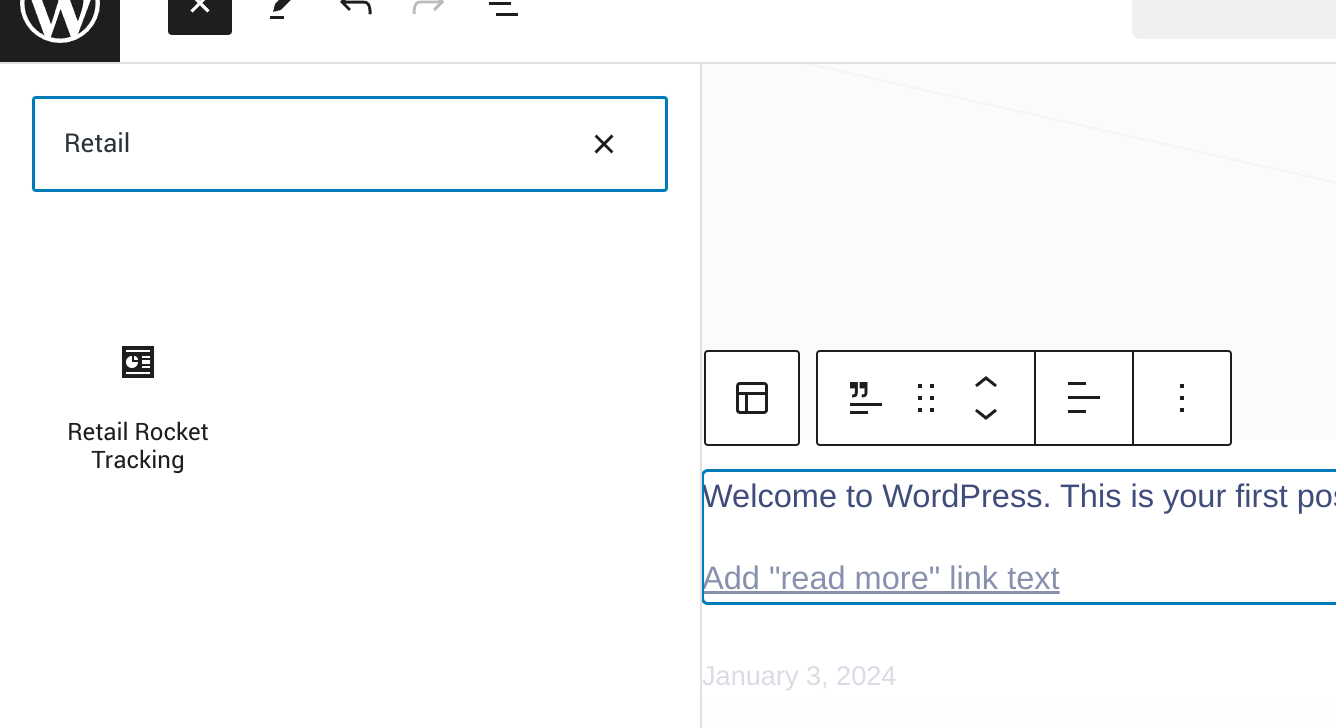
Drag the block to the needed place and fill the markup block id in the settings (to the right):
Updated 27 days ago