Magento 2 module
Module Download
You can download the Magento integration module via the following link.
Installation Guide
The following guide contains step-by-step instructions to help you to install and configure the module effectively.
You can also download it in PDF format here.
Module installation
To perform a manual installation of the module, follow these steps:
- Unzip the module and upload it to the
/app/code/directory of your Magento installation (if the
"code" directory does not exist, create it). The directory structure should look like this:
/app/code/RR/RetentionPlatformConnection - Next, using SSH, navigate to the Magento directory and execute the following commands:
php bin/magento setup:upgrade
php bin/magento setup:di:compile
php bin/magento setup:static-content:deploy -f
php bin/magento cache:flush
Apparently, with certain versions of Magento, accessing the admin panel after a manual
installation is not possible. If this is the case, simply disable the module and then re-enable it to
regain access.
php bin/magento module:disable RR_RetentionPlatformConnection
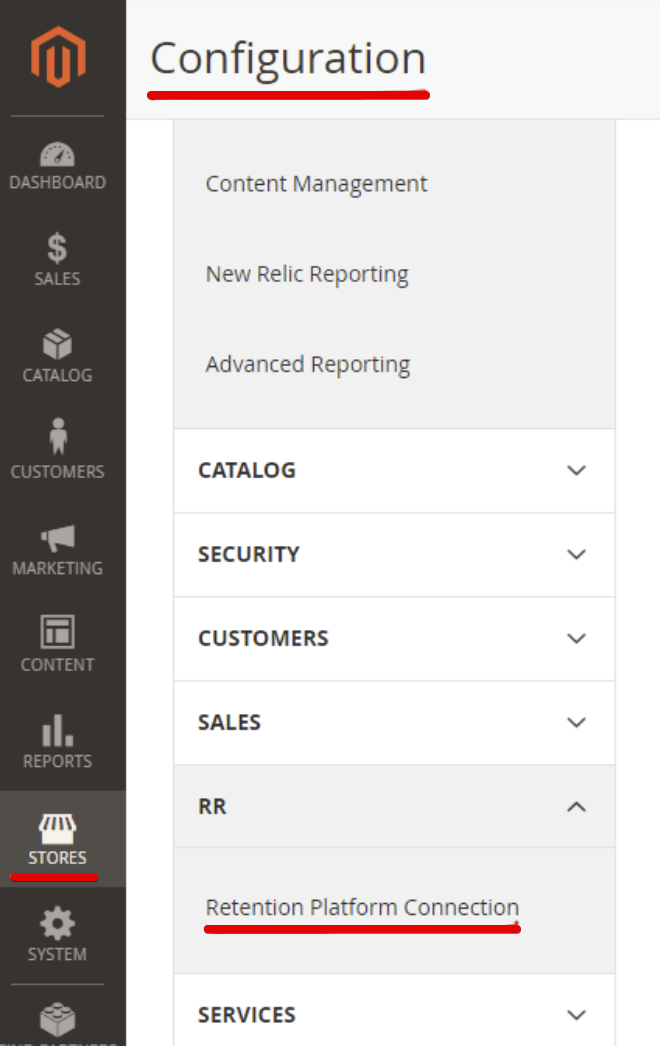
php bin/magento module:enable RR_RetentionPlatformConnection - Once installed and within the Magento admin panel, you can access the module configuration
through the menu:STORES -> Configuration -> RR -> Retention Platform Connection.
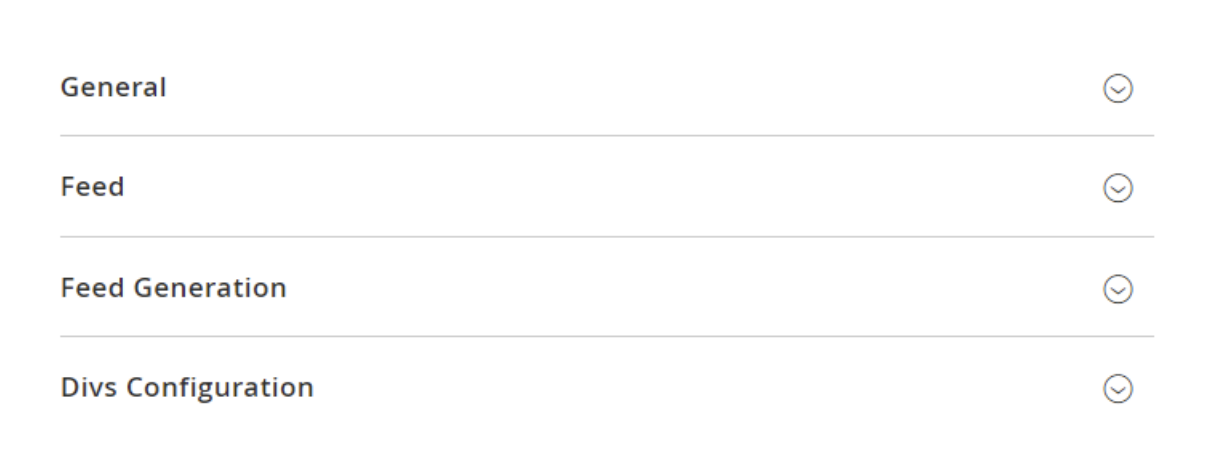
Module configuration
The module configuration consists of 4 sections: General, Feed, Feed Generation and Divs
Configuration:
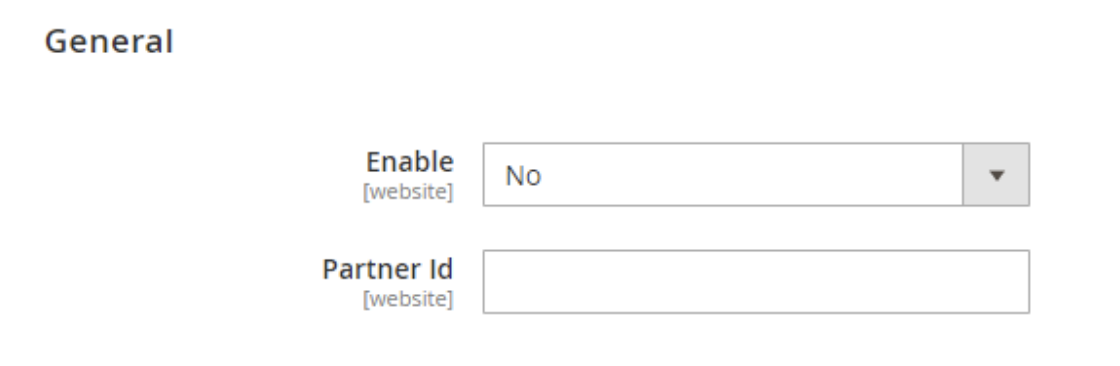
General
Here we have the option to Enable or Disable the module and enter the Client Partner ID
(provided by the Retail Rocket team):
Feed
From here, we can access various configuration options for the product feed:
- Include Only Active Products - Include only products enabled for sale;
- Include Customer Group Prices - Include prices for different customer groups that may
exist in the store; - Include additional Product Images - When set to "Yes," all images of each product will be
included in the feed. If set to "No," only the main image of each product will be included; - Product Image Type - Specify the size of the image to be included in the feed (based on
existing image sizes in the store); - Product Description Attribute - Choose whether to include the short or long description
of the product in the feed; - Default Vendor Text - Choose a default vendor name (brand) for products that have none
defined; - Additional Product Attributes to Include in Feed - Specify additional attributes to be
included in the feed (use CTRL key to select multiple); - Categories to Exclude - Specify categories that should NOT be included in the feed.
Typically, categories that are not product classifications but rather created for grouping
prices or offers should be excluded (e.g., "Autumn Sales" or "Discounted Products") (use
CTRL key to select multiple); - Languages to Include in Feed - Choose additional languages to include. Additional
languages will be included as parameters in the feed (name, description, and URL) (use
CTRL key to select multiple); - Currencies to include in Feed - Choose the currencies present in the store or their views
to be added as additional price parameters in the feed (use CTRL key to select multiple);
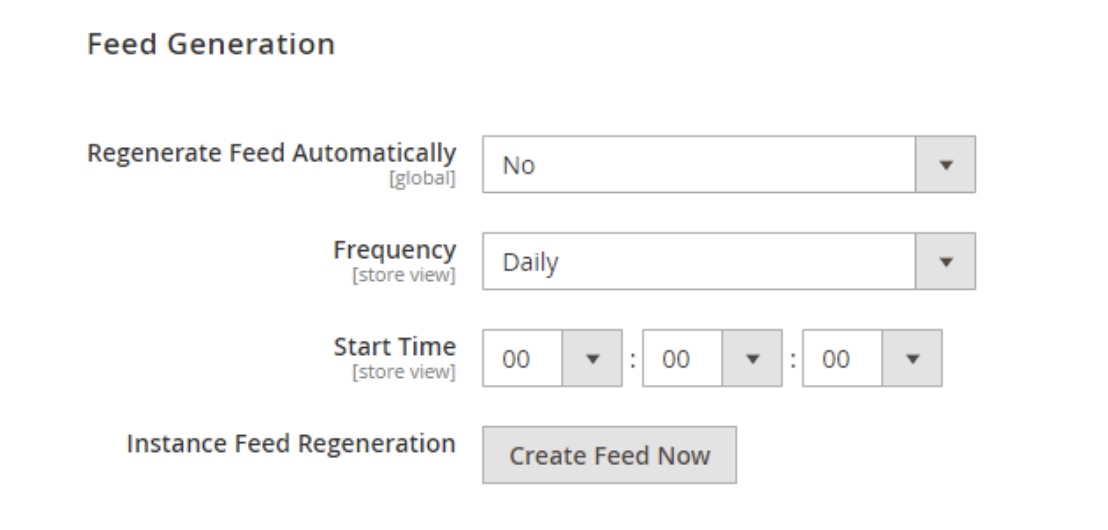
Feed generation
It allows enabling automatic feed regeneration, setting the frequency and start time.
Recommended frequency by default is “every 24 hours (daily)”.
This section also allows instantly creating a product feed through the "Create Feed Now"
button.
Divs configuration
Here, you can configure recommendation blocks (Divs) for each page of the store. Within each Div, you
need to specify the Markup ID (provided by Retail Rocket) and the position within the page
where you want it to appear. To specify the position, simply indicate after which block or DOM
element you want the corresponding Div to be placed. You can use HTML class or ID identifiers
for the elements (following the rules of element identification in CSS).
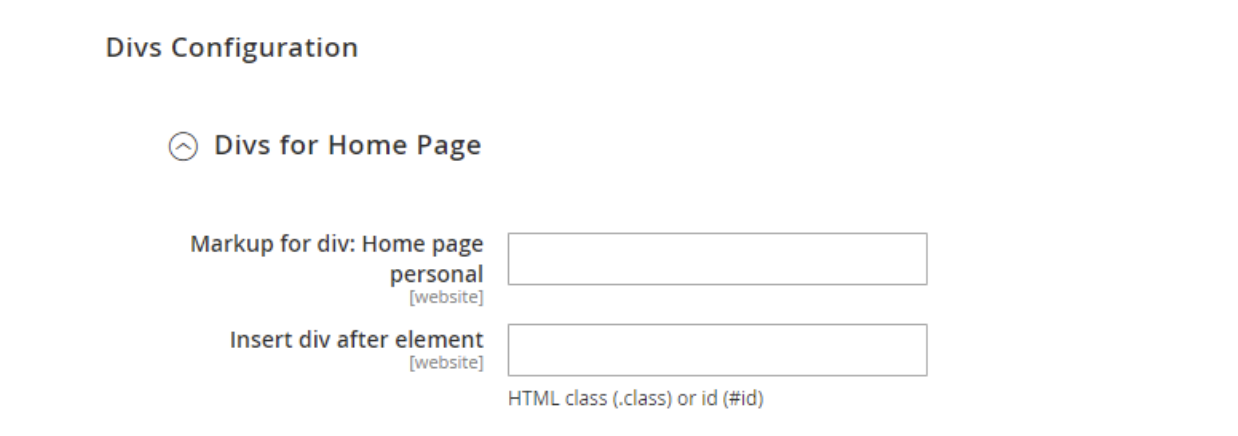
Divs that do not have a specified Markup ID will not be displayed on the front-end of the store.
Updated about 1 month ago