Shopify module
Important: the module is only compatible with Shopify 2.0 and later versions (it does not work with 1.9 since the templates are different)
Module Download
You can install the Shopify integration module via the following link.
Installation Guide
The following guide contains step-by-step instructions to help you to install and configure the module effectively.
Module installation
After installing the module you will see the short activating guide. Let's follow this plan.
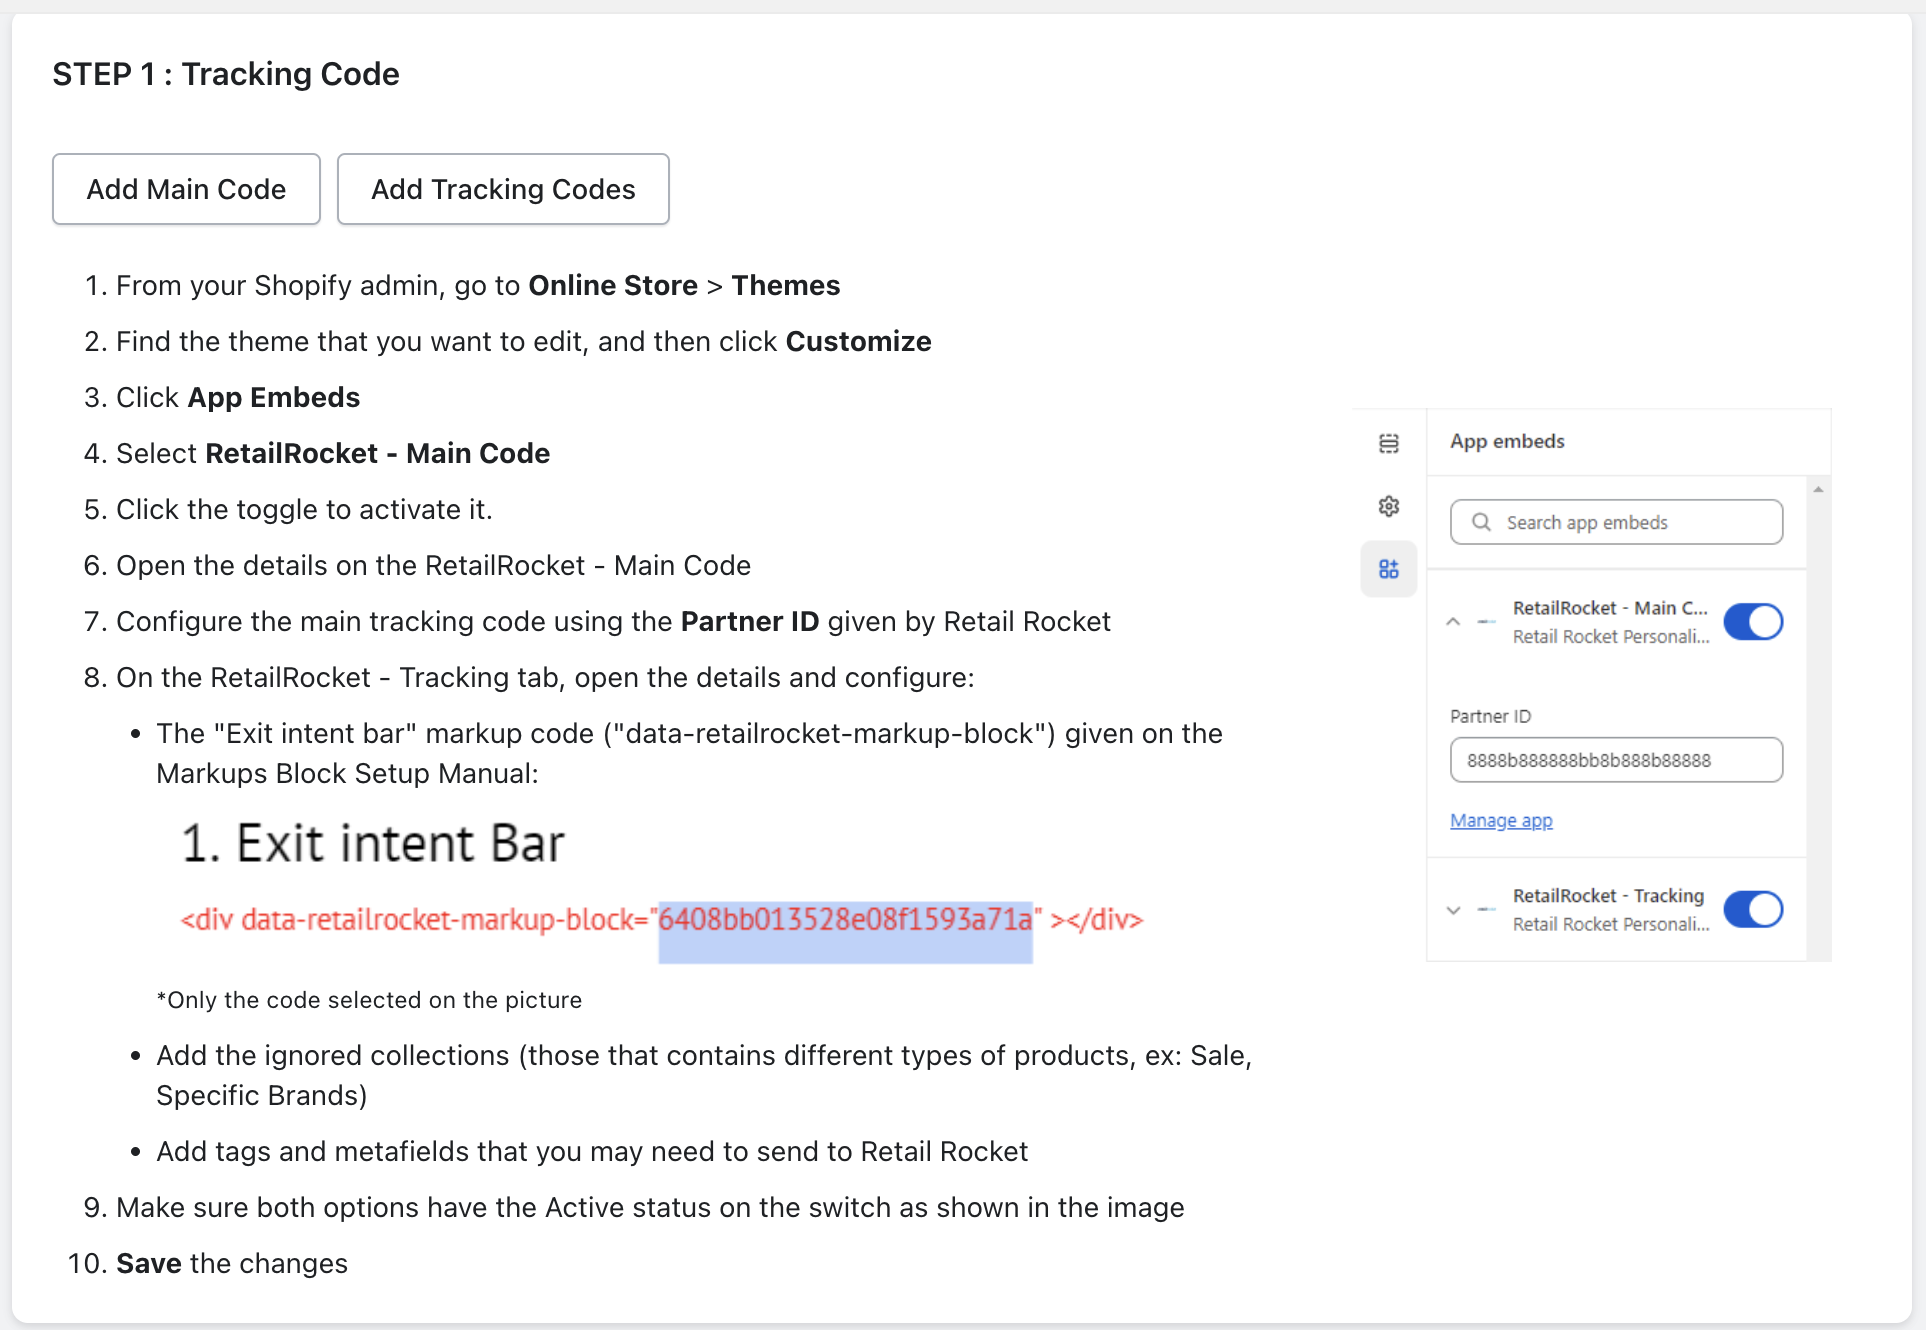
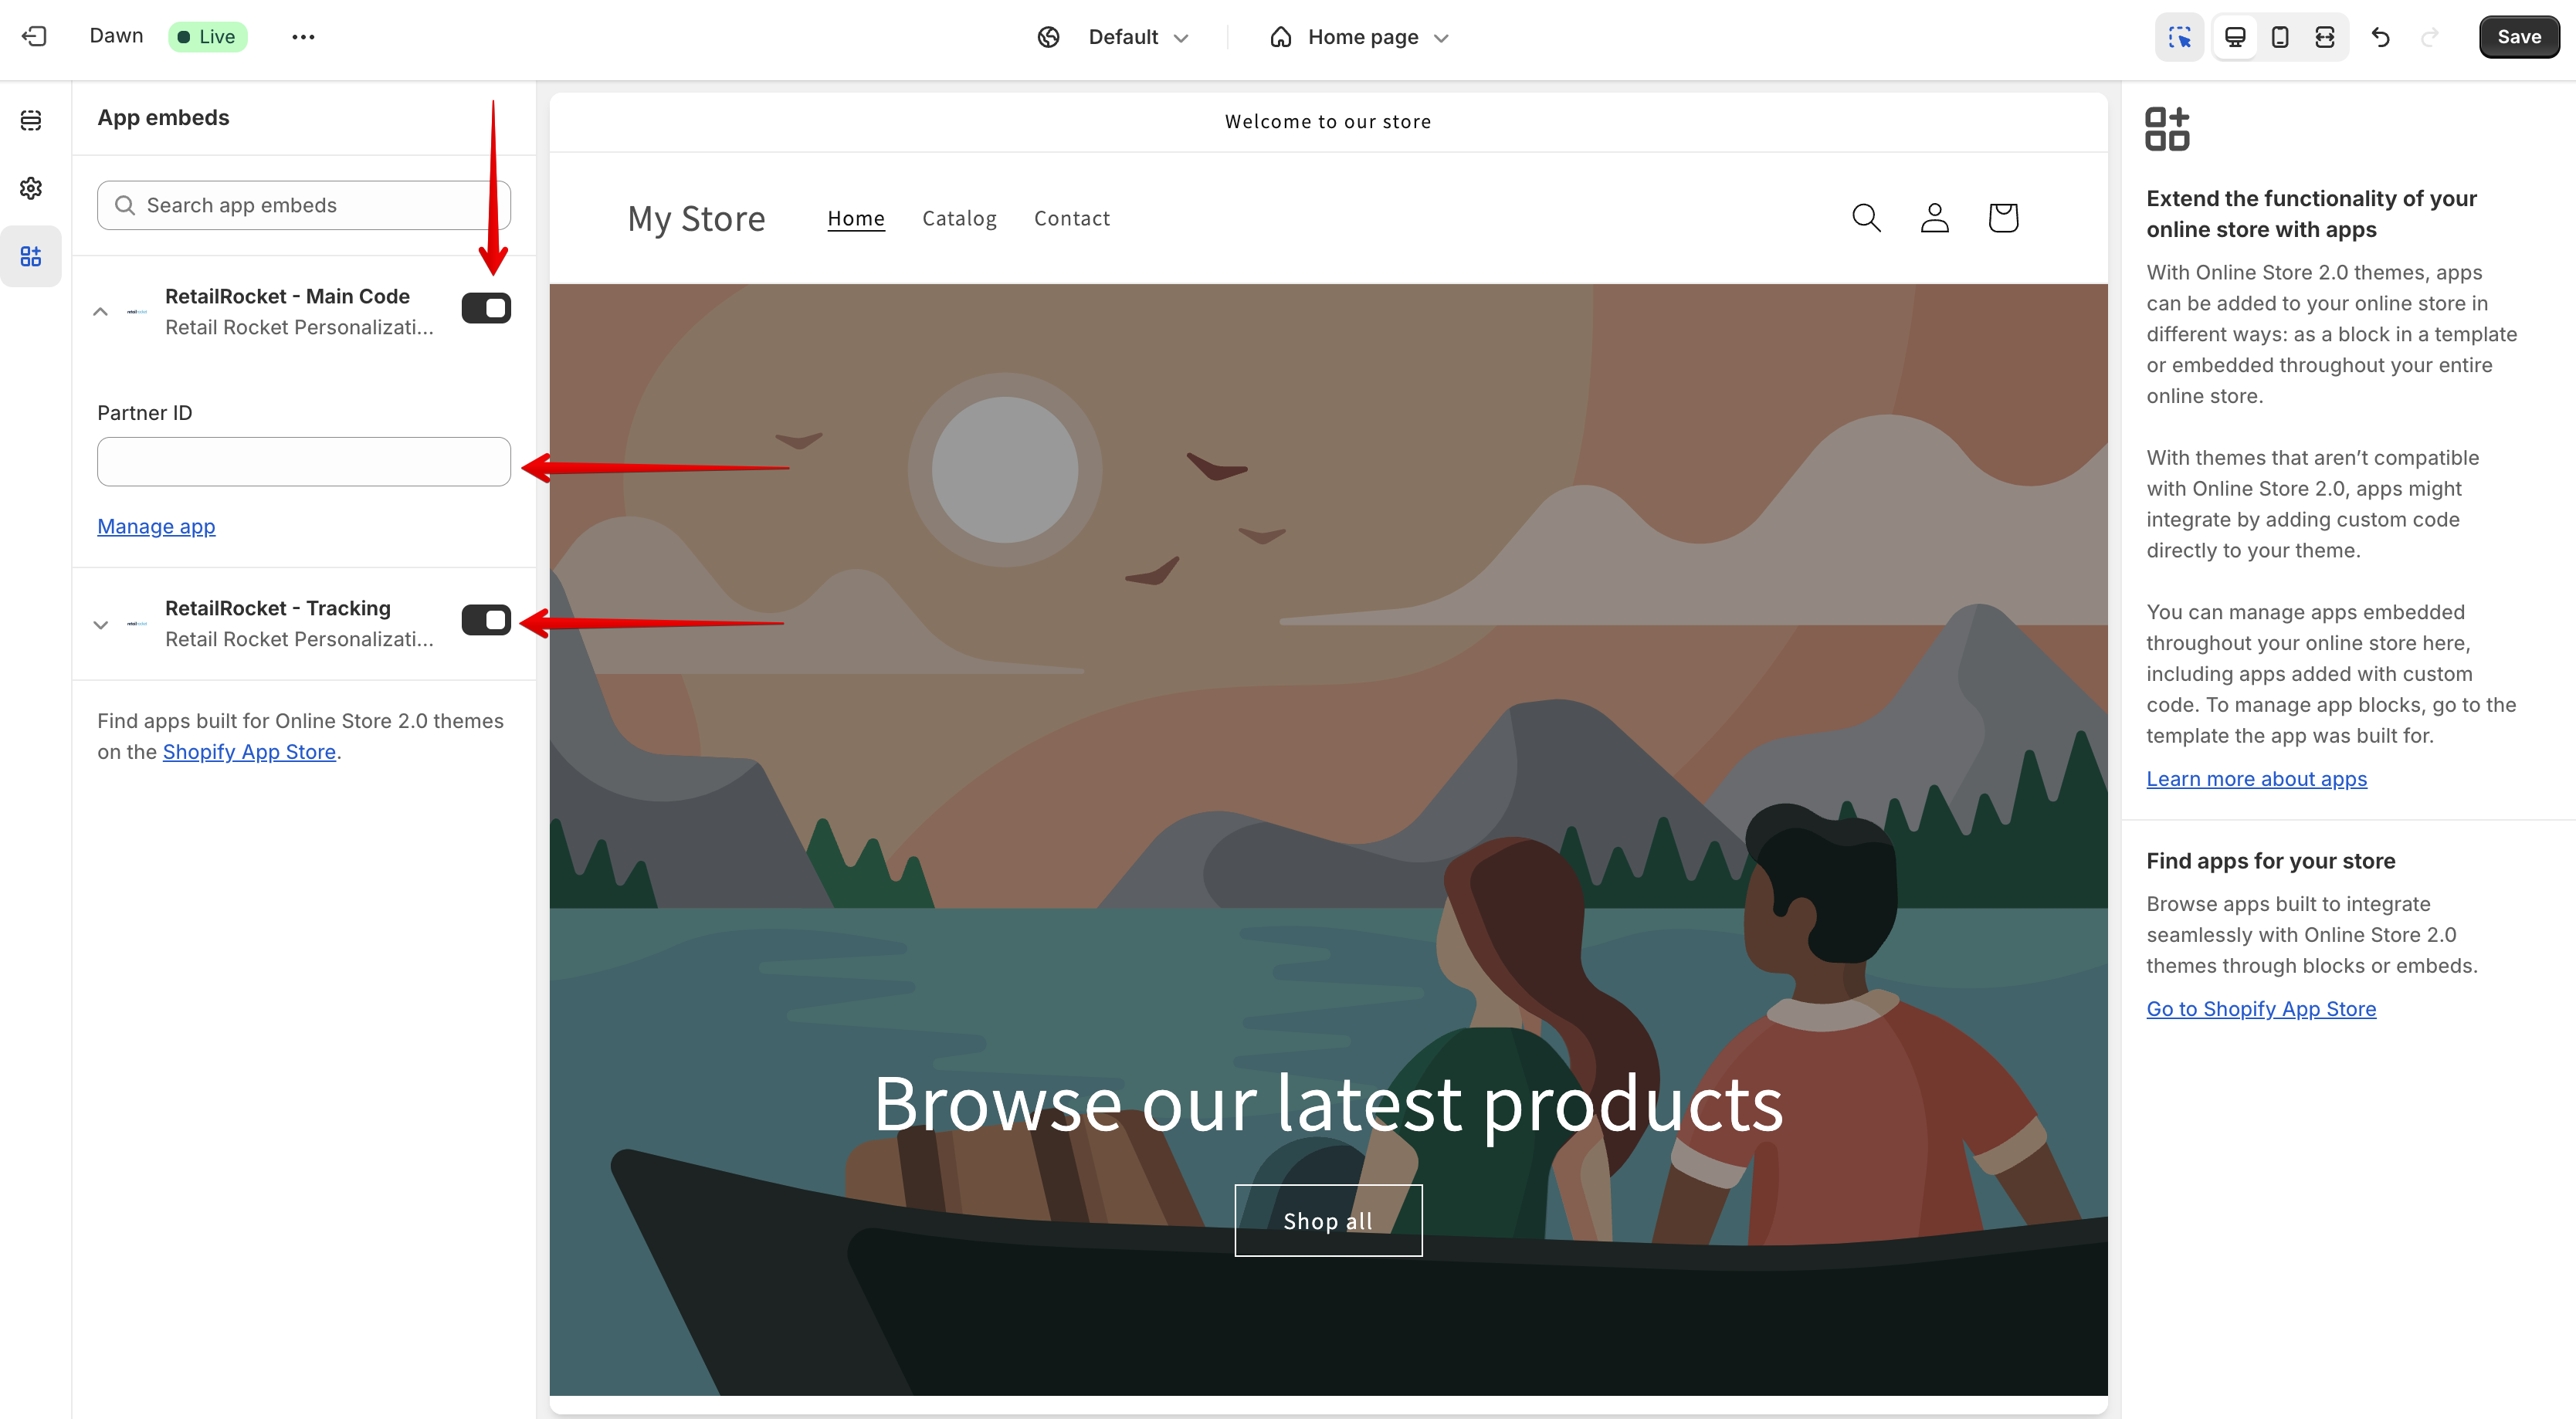
Add Main Code
By clicking on “Add Main Code” you will be redirected to the template.
Here you need:
- Click the toggles to activate it.
- Enter the Partner ID given by Retail Rocket
- Click "Save" in the right upper corner
Add Tracking Codes
By clicking on “Add Tracking Codes” you will be redirected to the template.
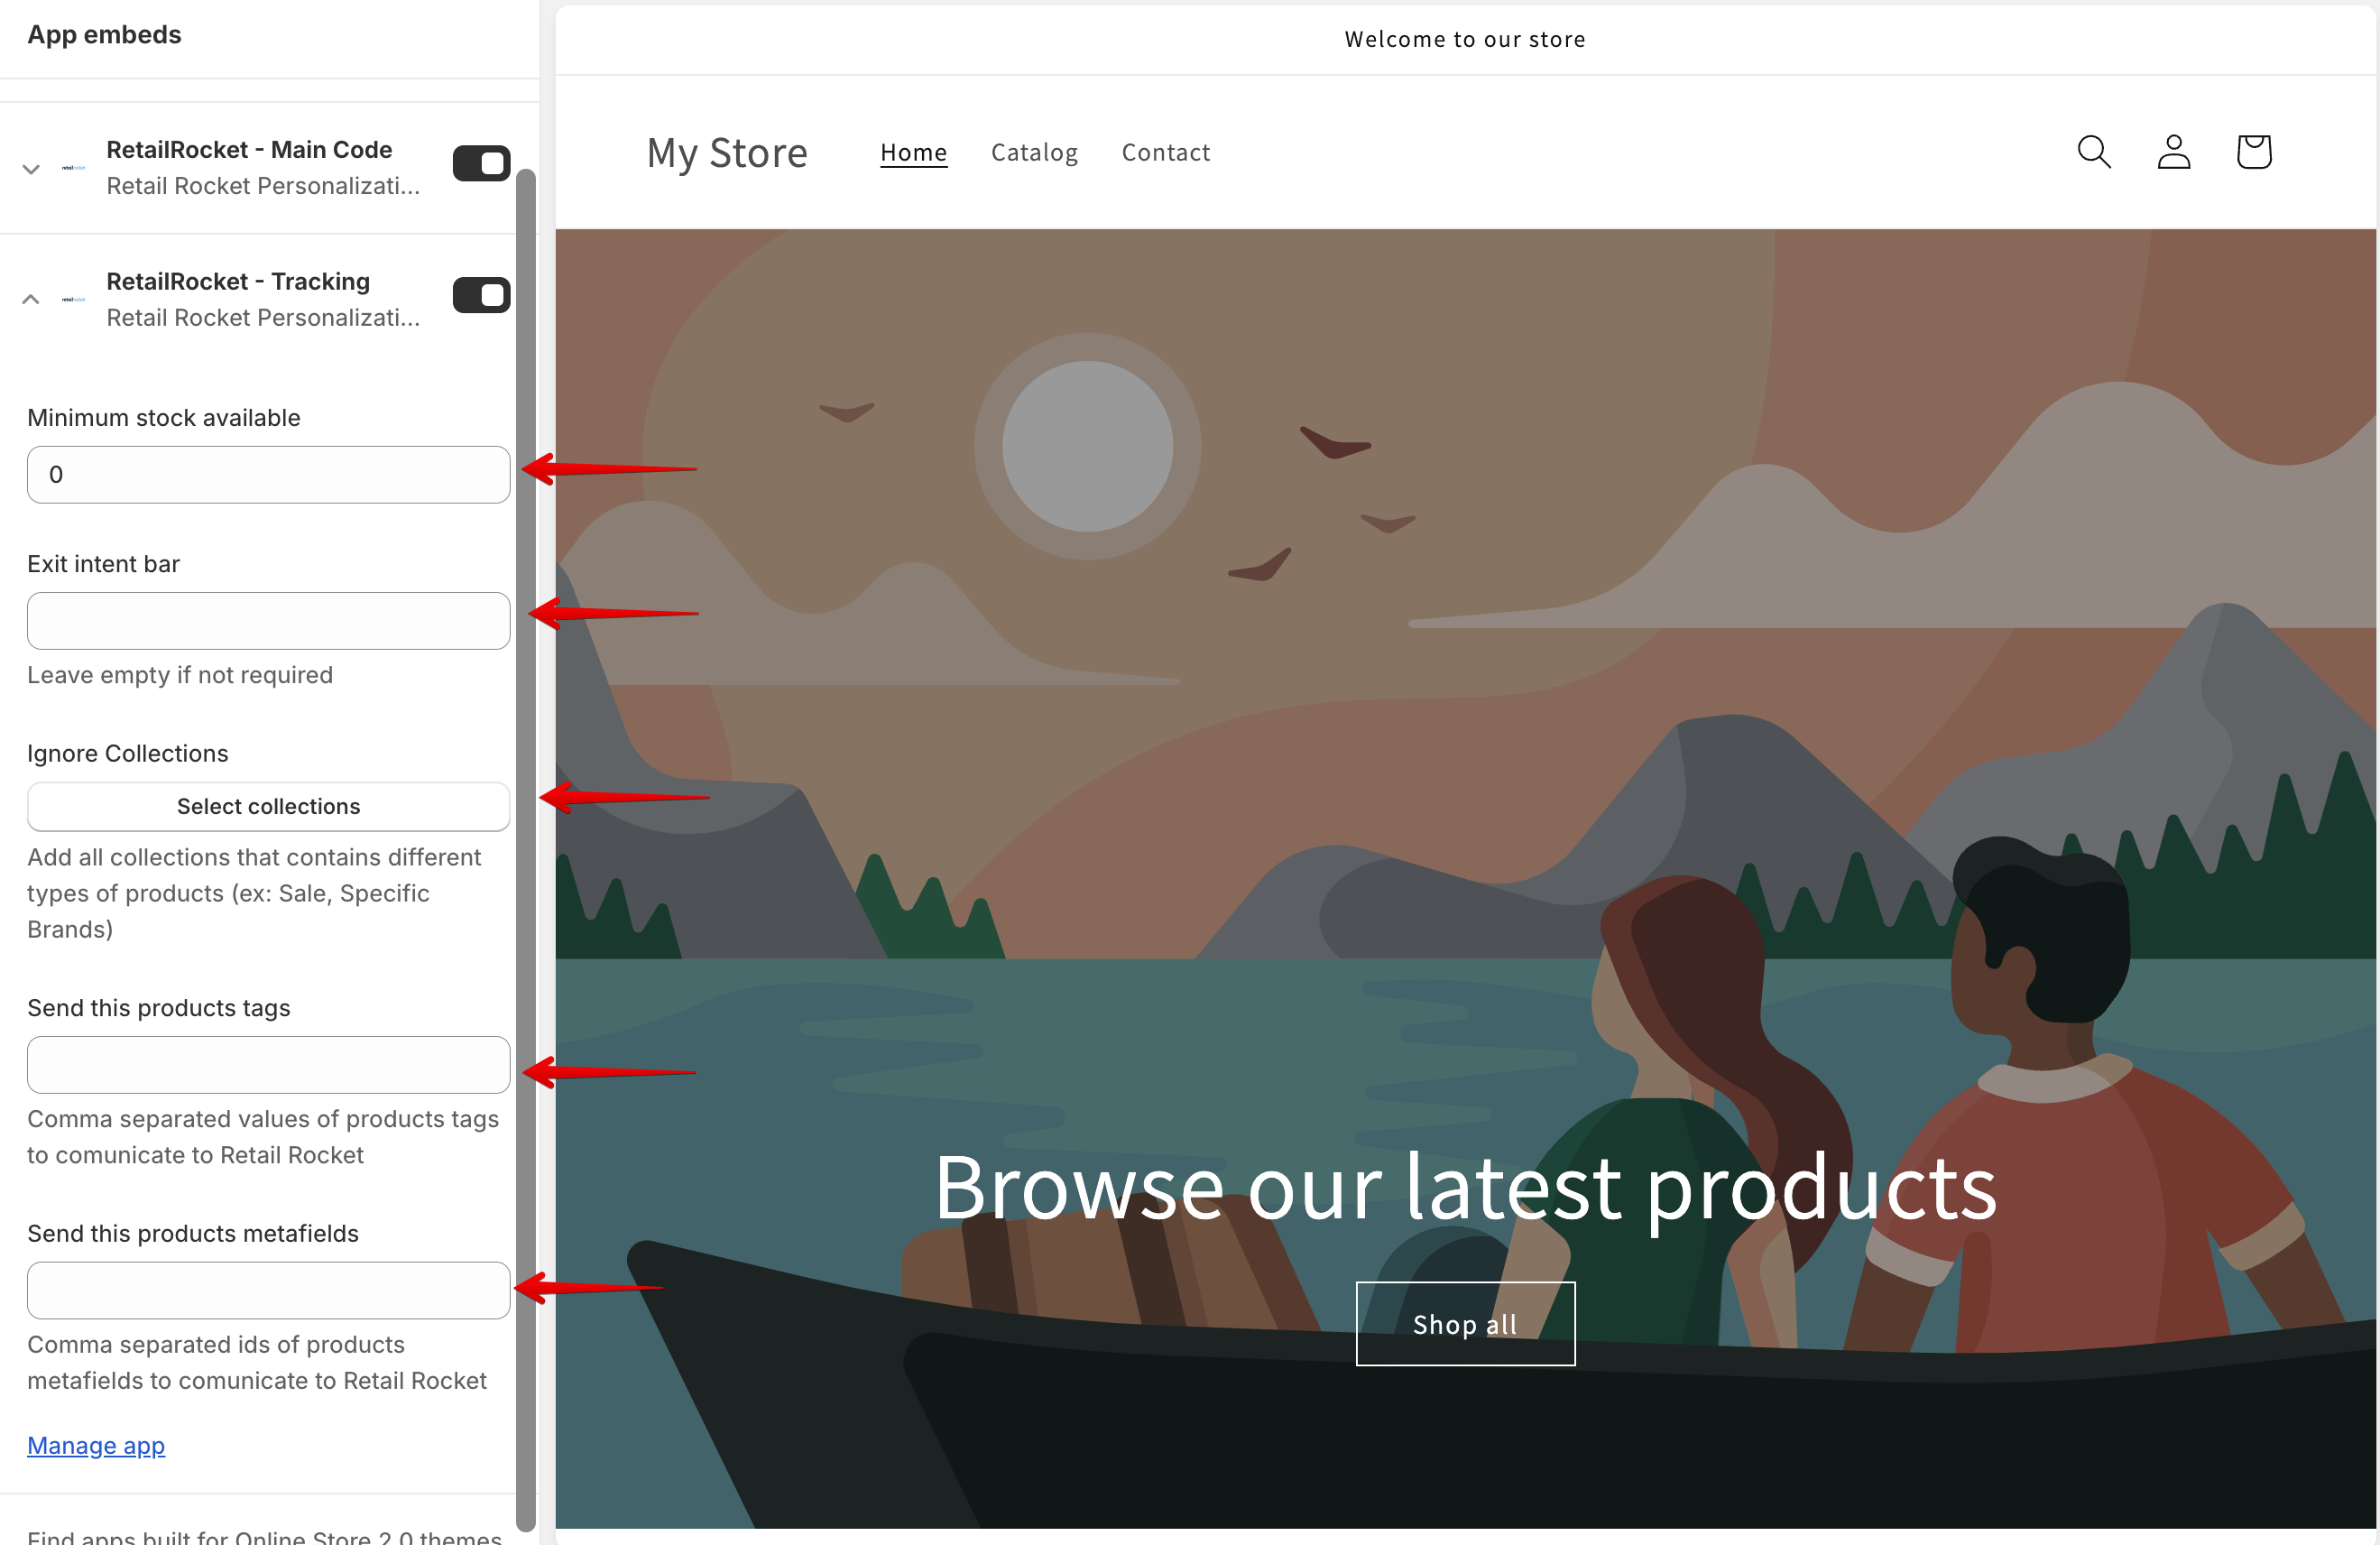
Here you need:
- Enter ID of exit intent bar (optional, in case you don't have it - skip it)
- Select all the categories that you want to “exclude”. Clicking on “select collections” opens a new menu with all collections.
- To add additional parameters to products, by clicking "Send this products tags". You can find the tags in the template of each product. All tags will be added in "params" section in product tracking code.
- To add metafields. Metafields are pretty close to tags, but their fields are often visible within the site. For example, office information, description, etc. The metafields are also listed in the product template.
ExclusionThe exclusion indicates that in the product code (productsGroup.post) product will not receive this categoryPath, therefore it will not be included to the catalog.
You need to exclude such categories as "Special Offers", "Sale", "Brands", "Collections", and other "not-product" categories.
Product tagsImportant: the names of the product tags must be added in the same way as they are configured within the site. For example: if we have tag "Clothing_Size", then "clothing_size" is not the same.
Markups
On the main page of module, lets move to the next step.
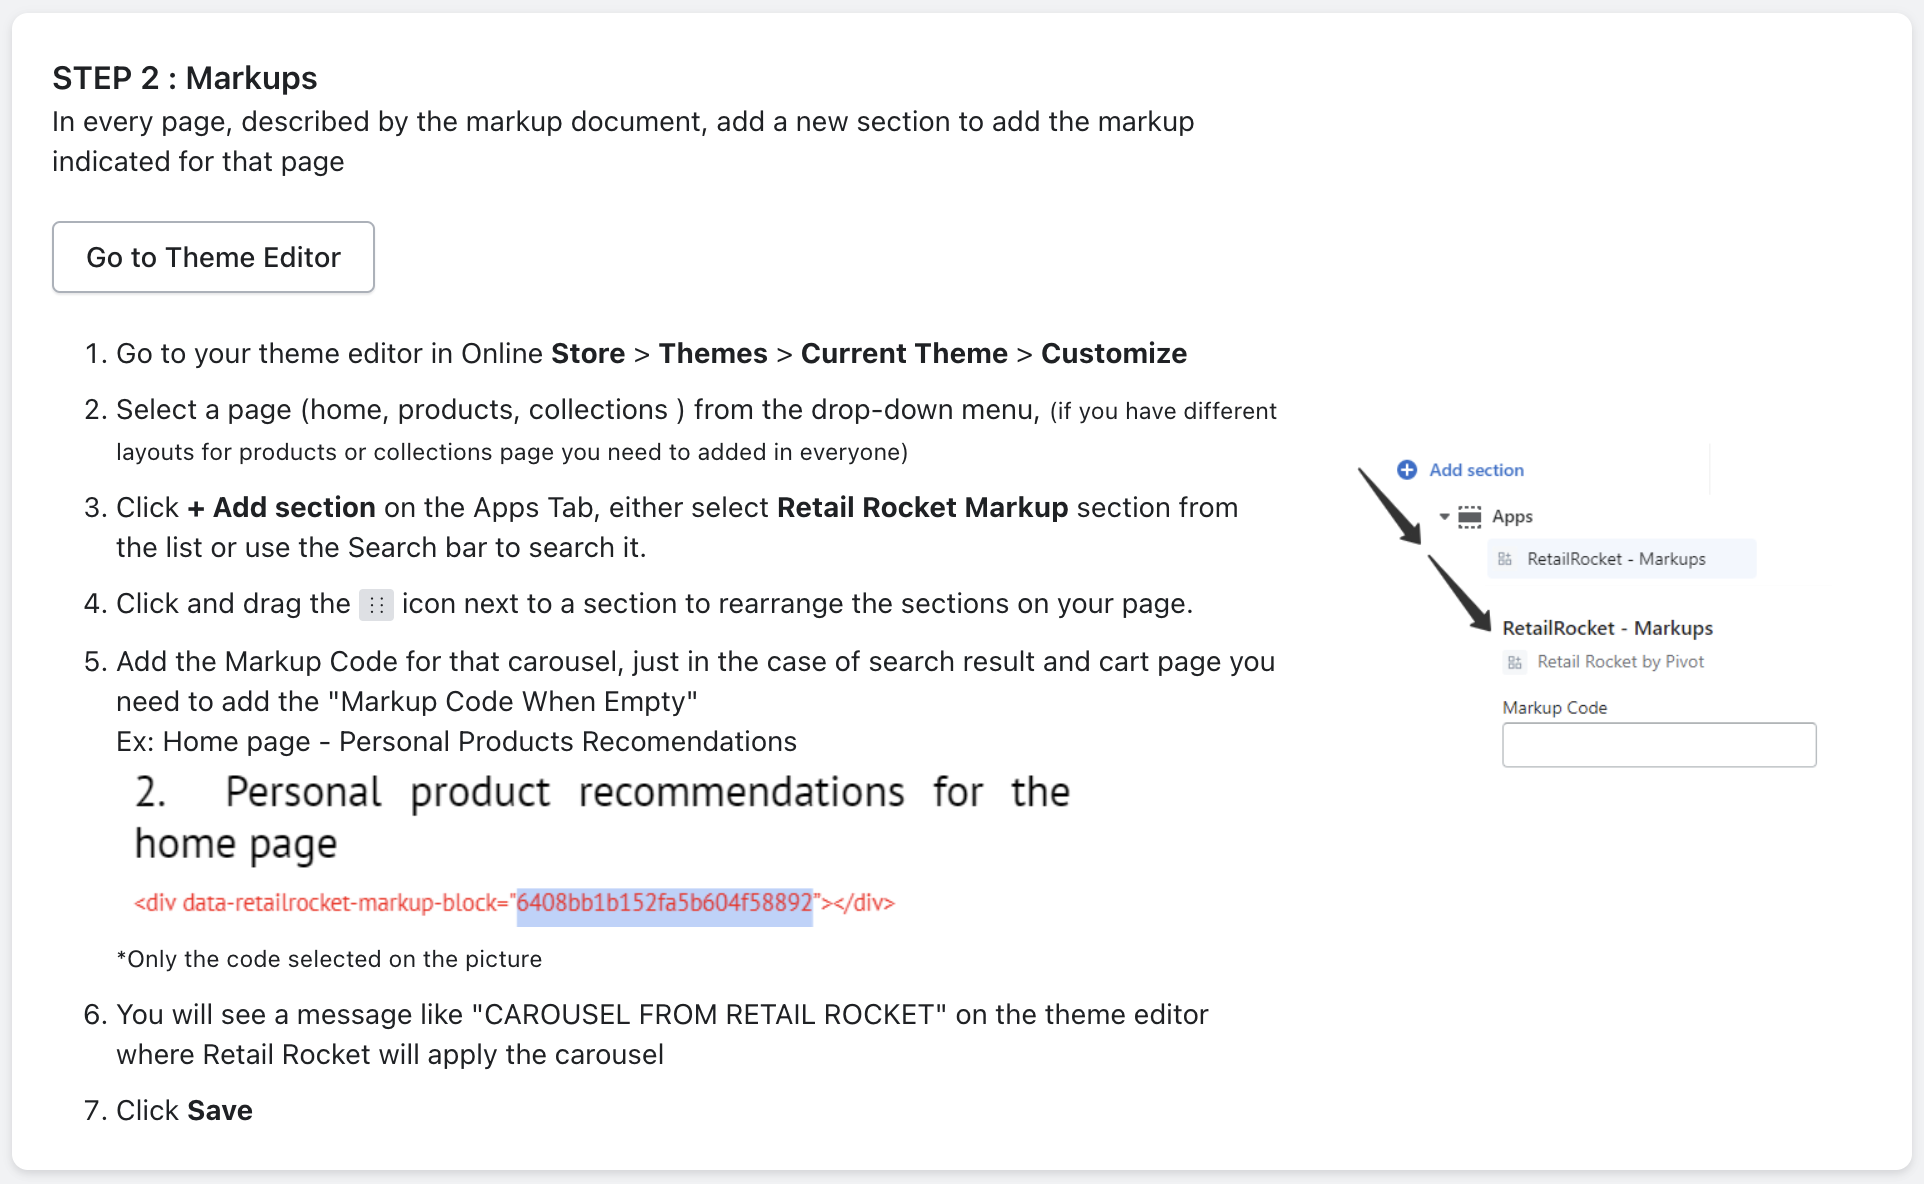
Click "Go to Theme Editor", and you will be redirected to the template.
Here you need:
- To click "Add section"
- In the new window click "App"
- Click "Retail Rocket - Markups"
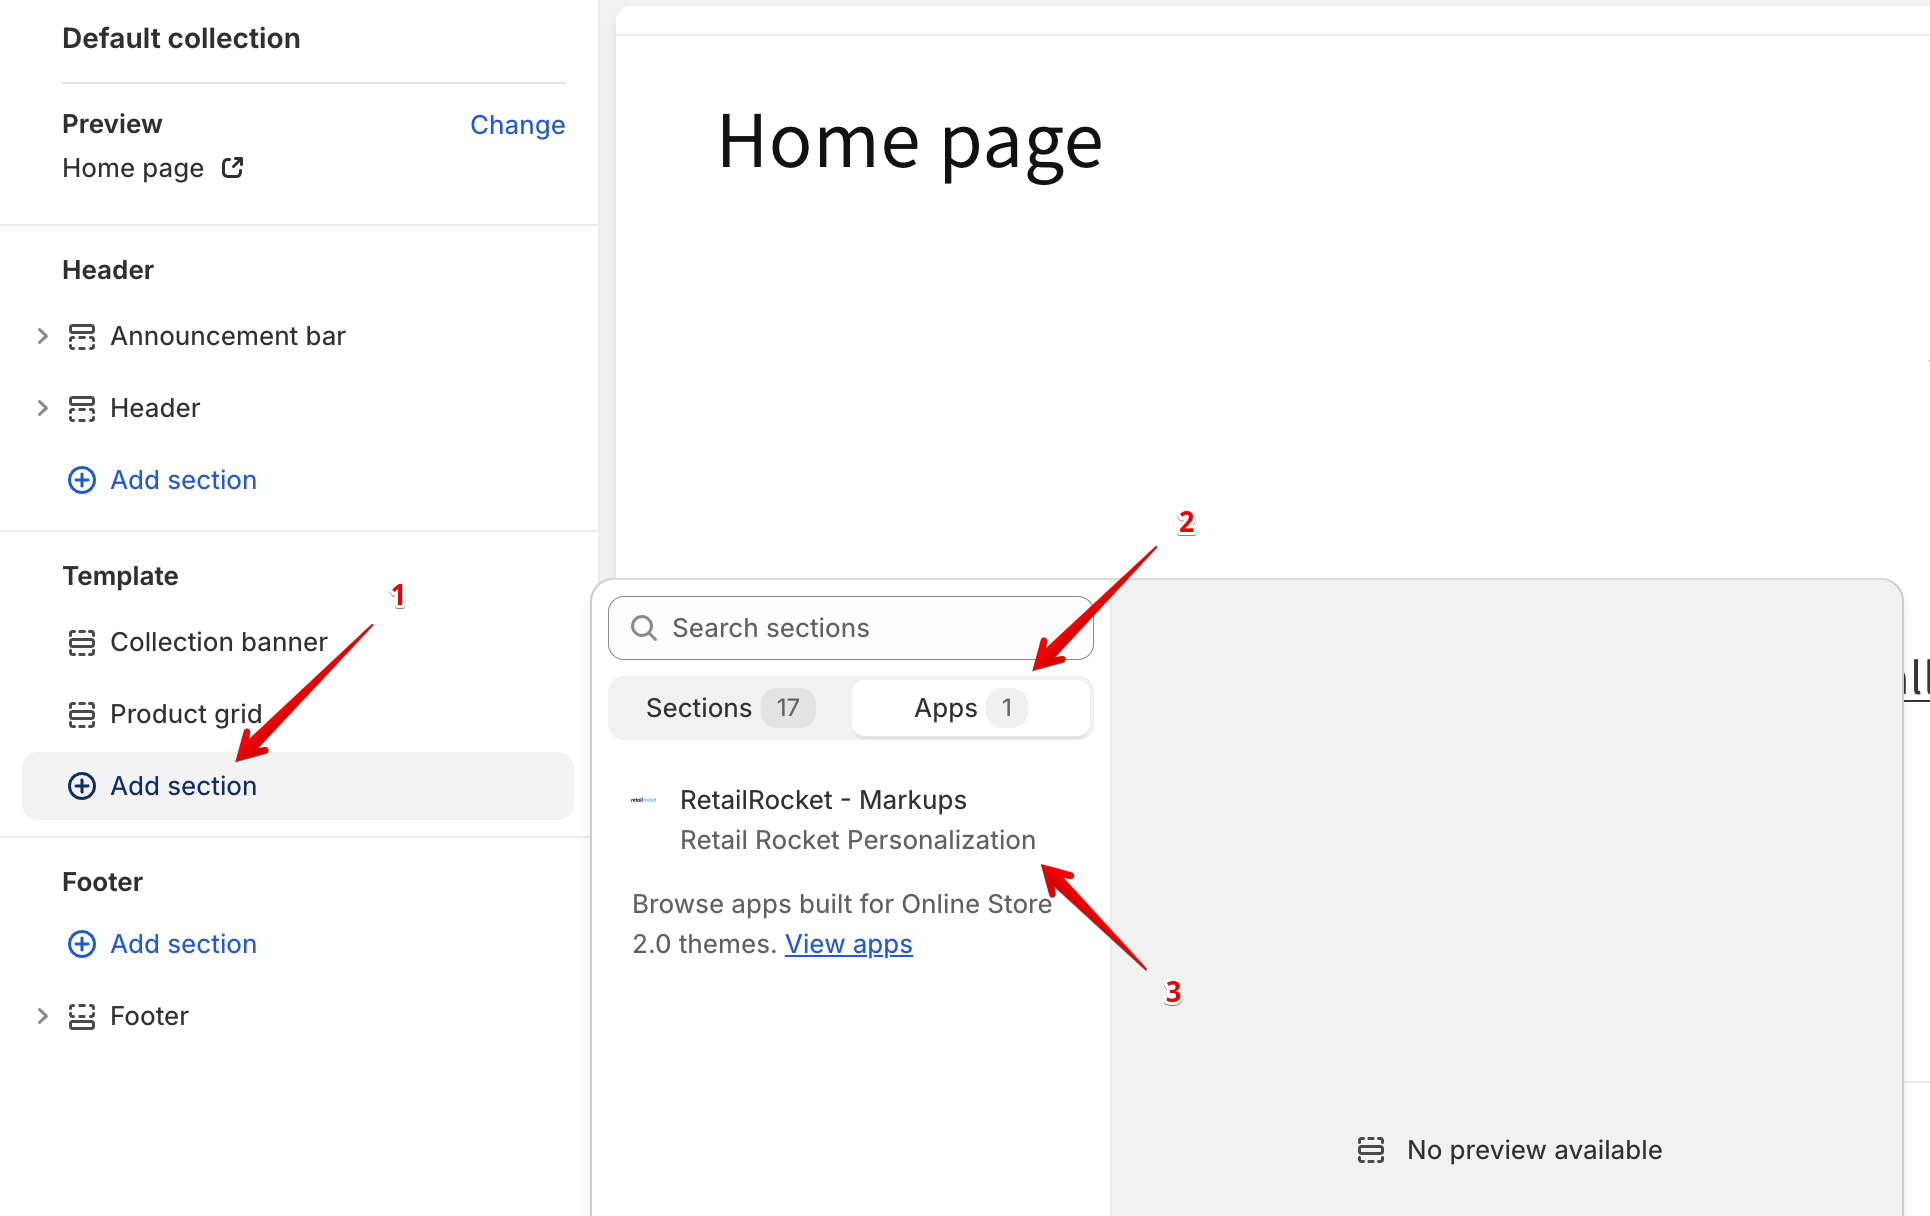
Now you can add ID of markup block, and also to move markup in every place of the page that you need:
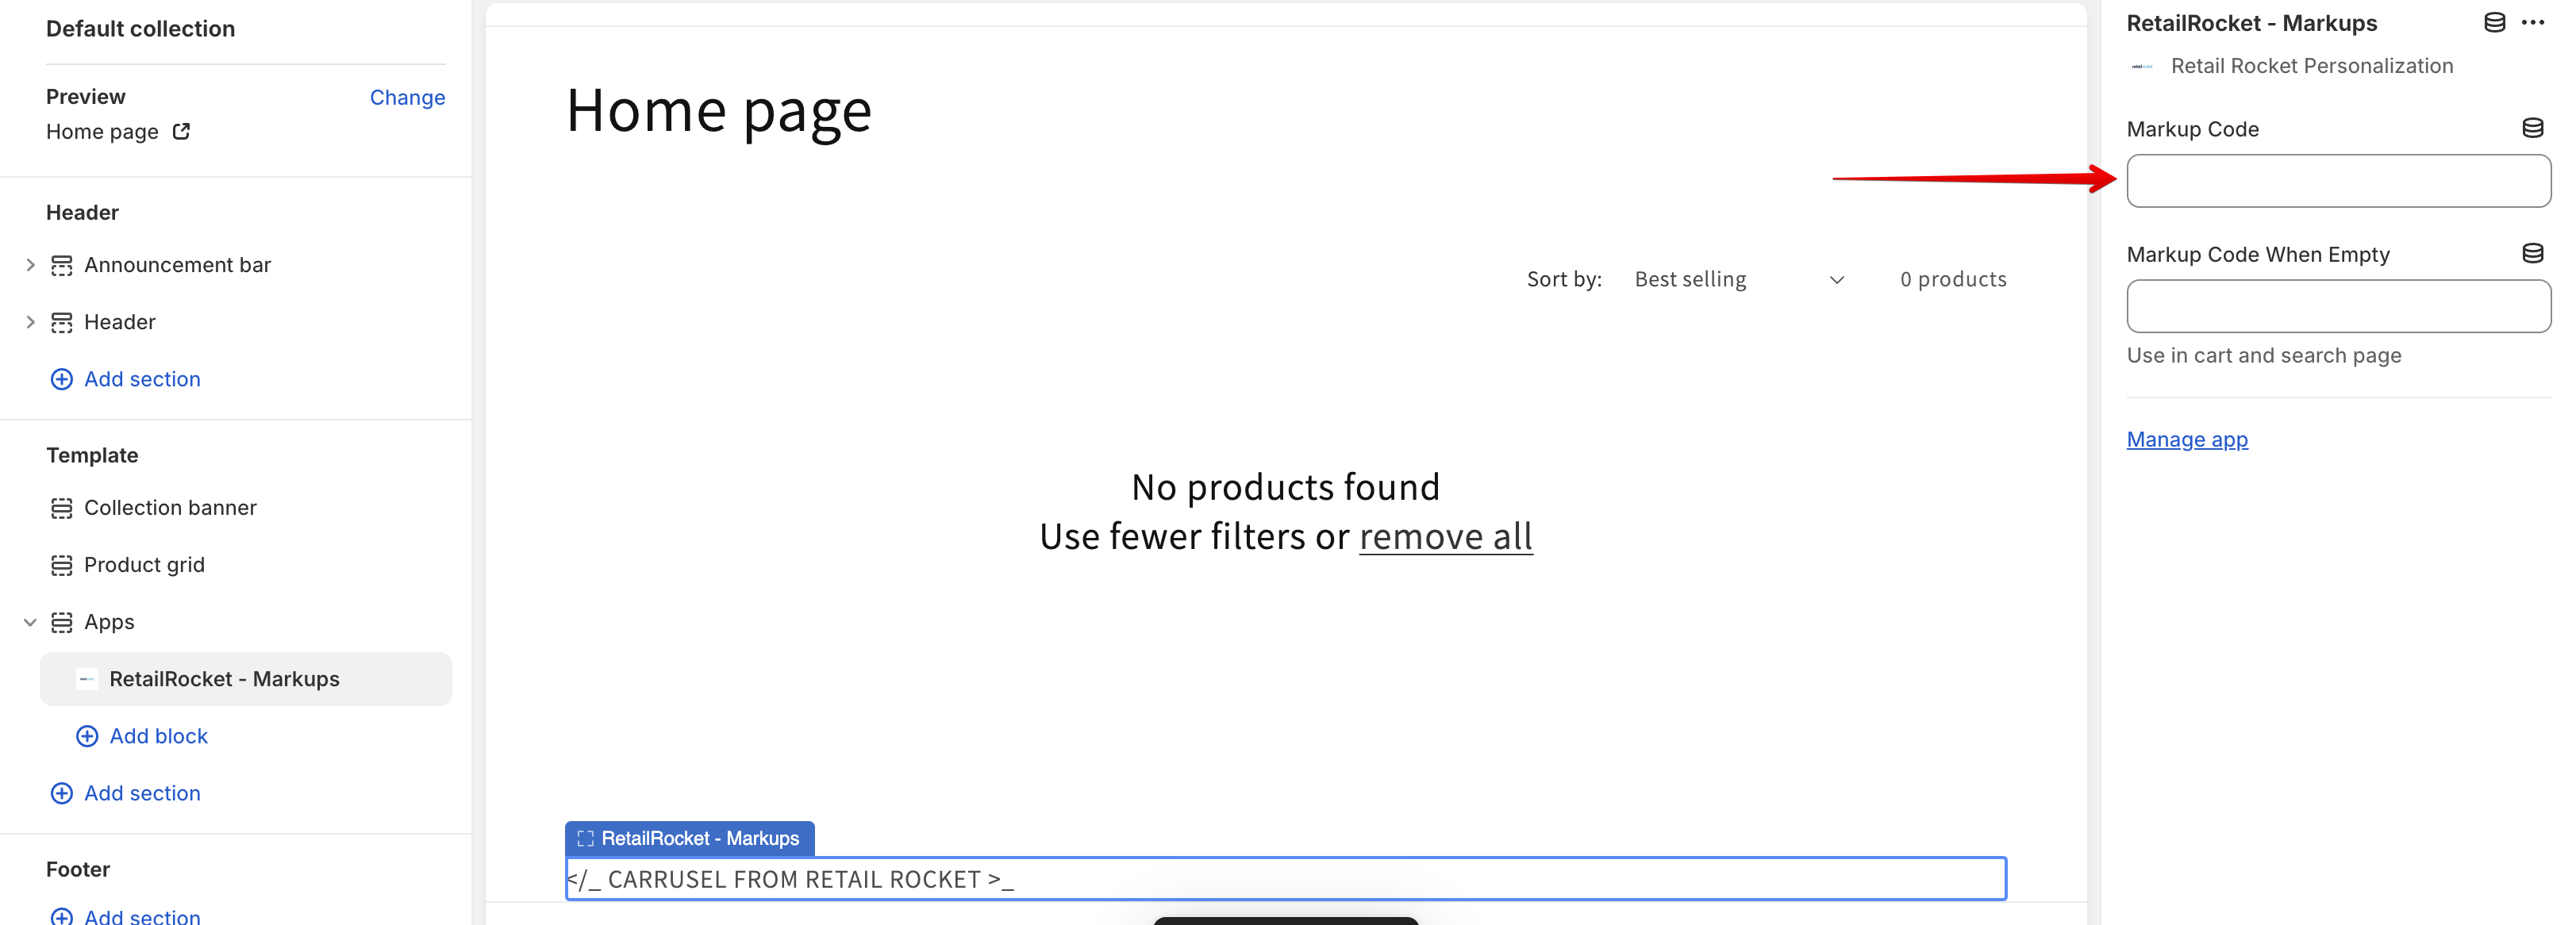
Markup Code When EmptyOnly for empty search page and for empty cart page, it's necessary to add ID is the second cell.
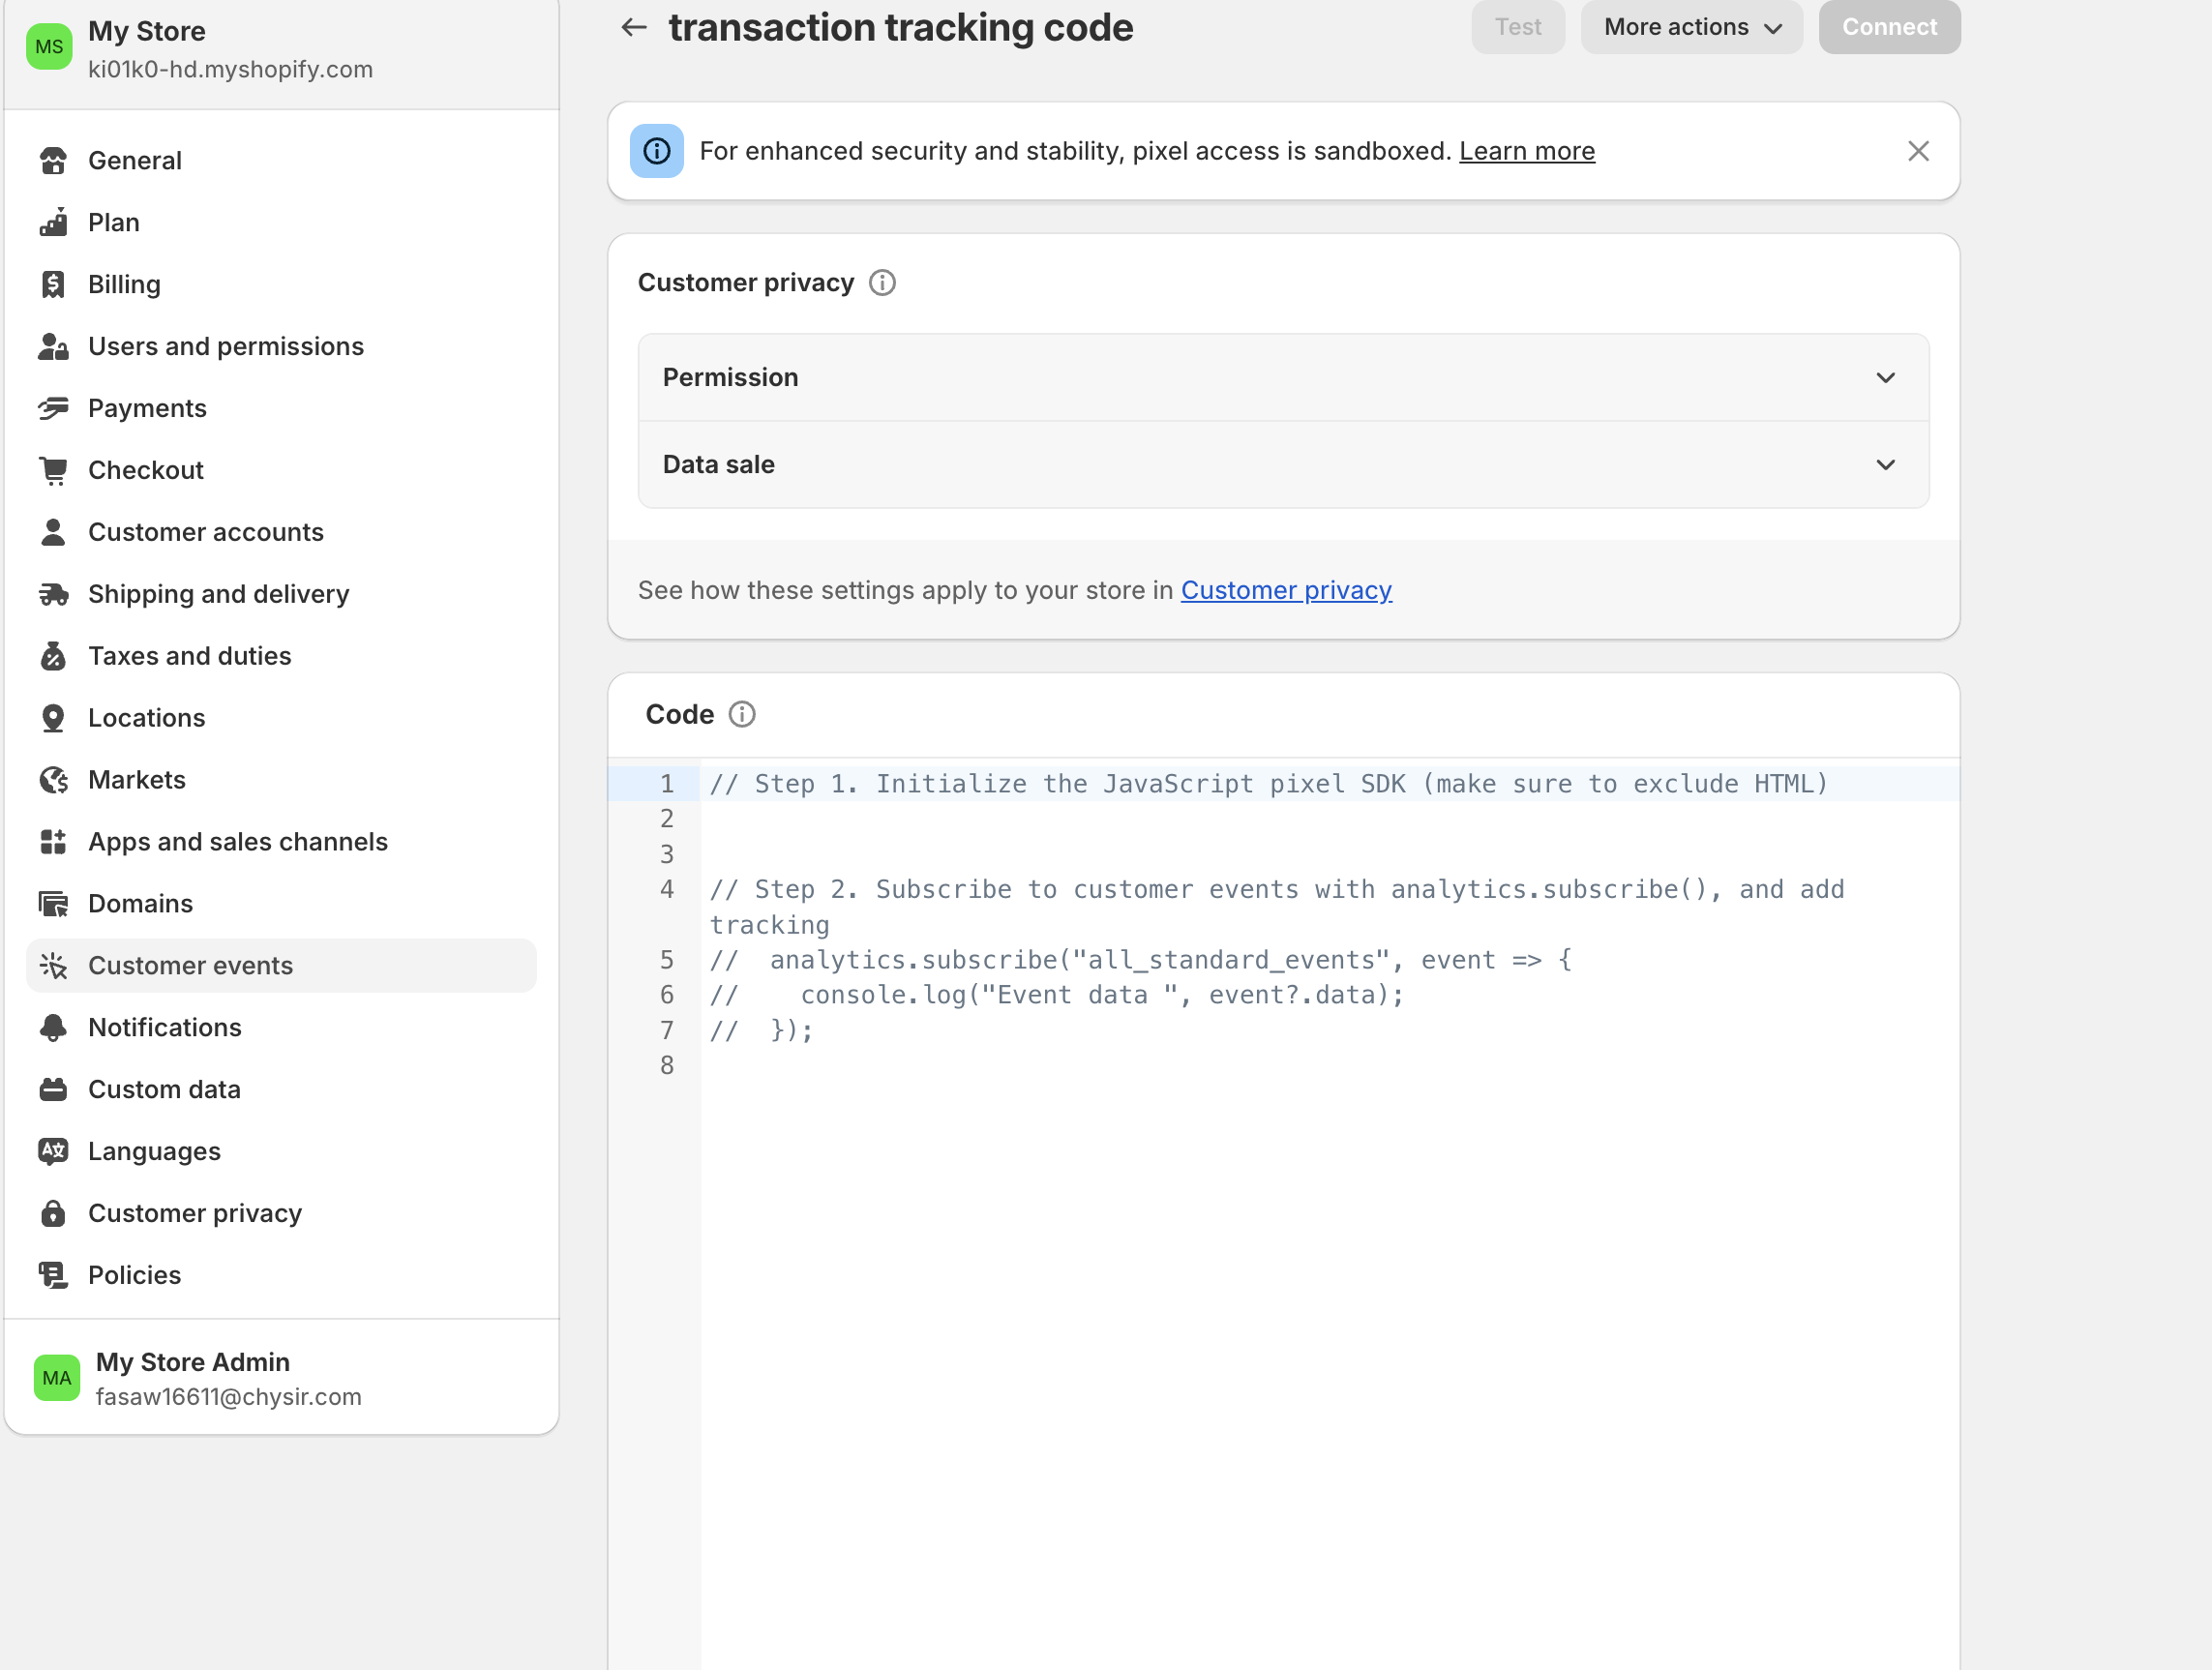
Conversion tracking script
On the main page of module, lets move to the next step

Click "Go to Settings", and you will be redirected to the template.
On this page you need to create a new pixel, let's call it "Transaction tracking code"
Updated 30 days ago